Binding Sets
A Binding Set contains a set of actions a creator has defined for the game and the default key bindings to trigger those actions.
New Core projects created, will contain a Binding Set that will have the default Core bindings set up already in the Hierarchy. This will allow creators to modify the default Binding Set to customize it for their game, or remove it and create their own. If there is no Binding Set in the Hierarchy, the default controls will be used.
Opening the Bindings Manager Window
From the Window menu, select Bindings Manager to open up the Bindings Manager window. The Bindings Manager window allows the creator to create Binding Sets and bindings for a Binding Set.

Creating a Binding Set
A Binding Set needs to be placed into the Hierarchy. A new Binding Set will not overwrite an existing Binding Set that is in the Hierarchy. For example, if one Binding Set has Space set to perform the Jump action, and another Binding Set has Space set to perform the Crouch action, then both actions will be performed.
Bindings Manager
A Binding Set can be created from the Bindings Manager window by clicking on the button Create new Binding Set. When a Binding Set is created, it will be added to My Binding Sets in Project Content.
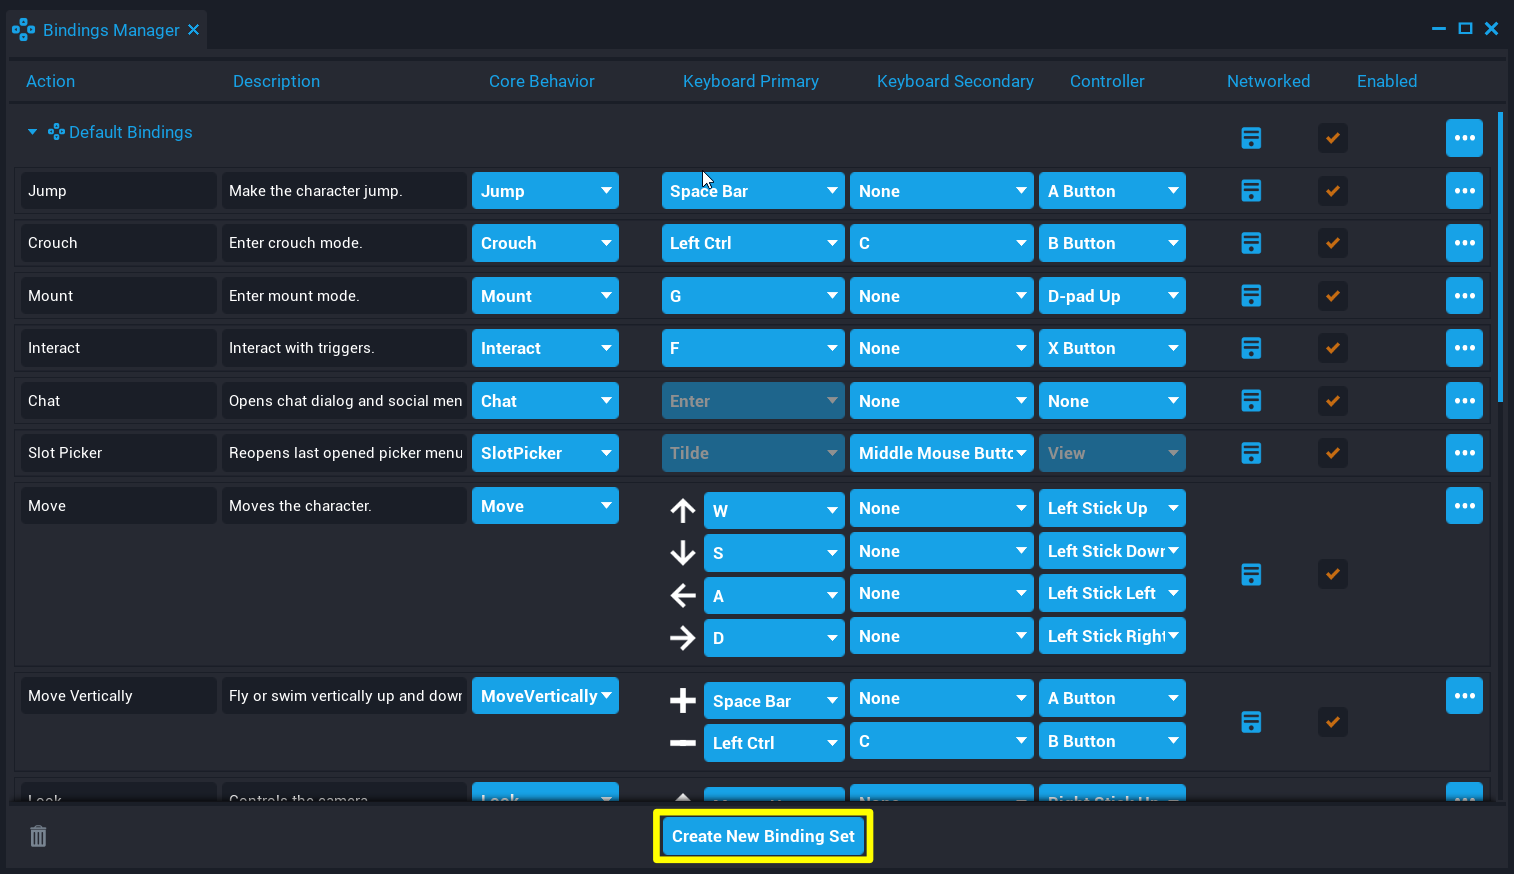
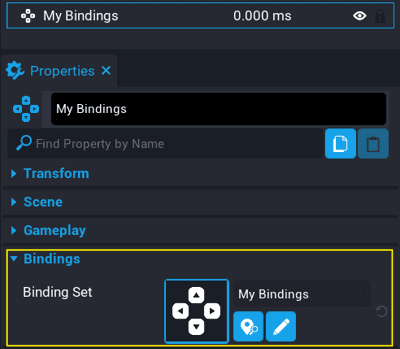
Binding Sets created this way will have the property Binding Sets under Bindings already set up with the asset reference when placed into the Hierarchy.
Binding Set Component
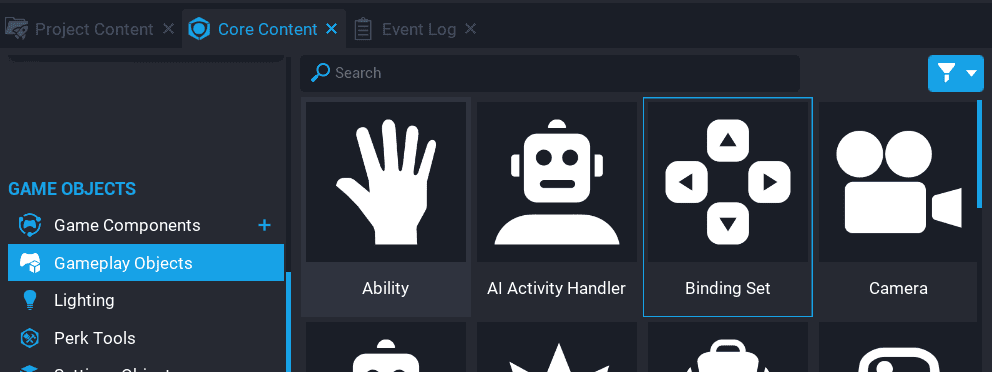
A Binding Set can be created by dragging the Binding Set component from Gameplay Objects under GAME OBJECTS into the Hierarchy. This object will not have the Binding Set asset reference created, the creator would need to create a new set of bindings, and drag the asset onto the property.
Adding a Binding
A binding can be a specific key, button, or directional control that performs an action.
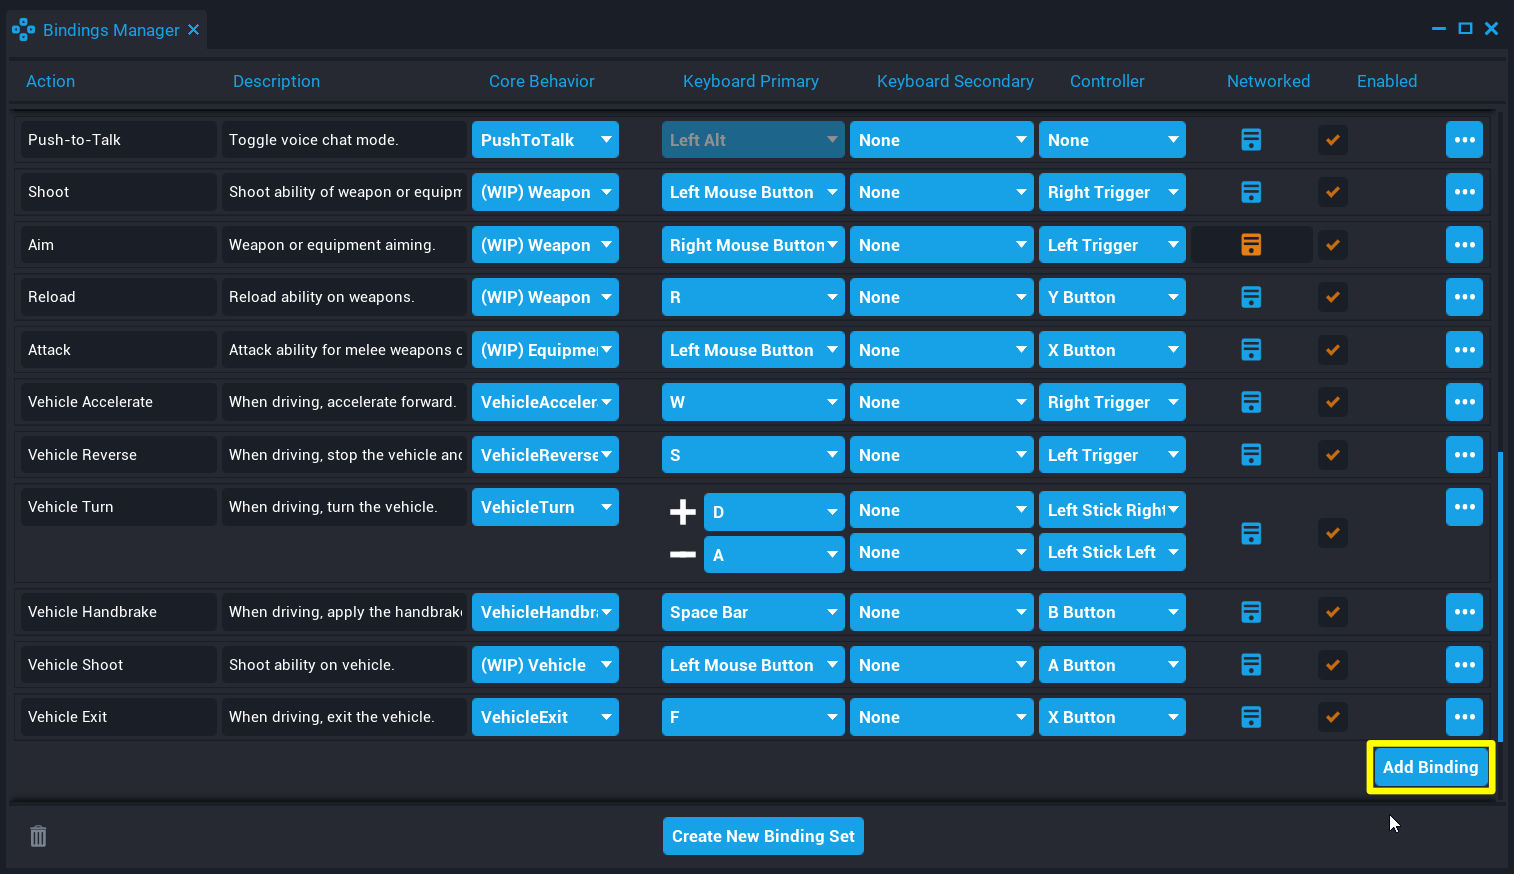
Adding a binding to a Binding Set can be done from the Bindings Manager window by clicking on Add Binding.
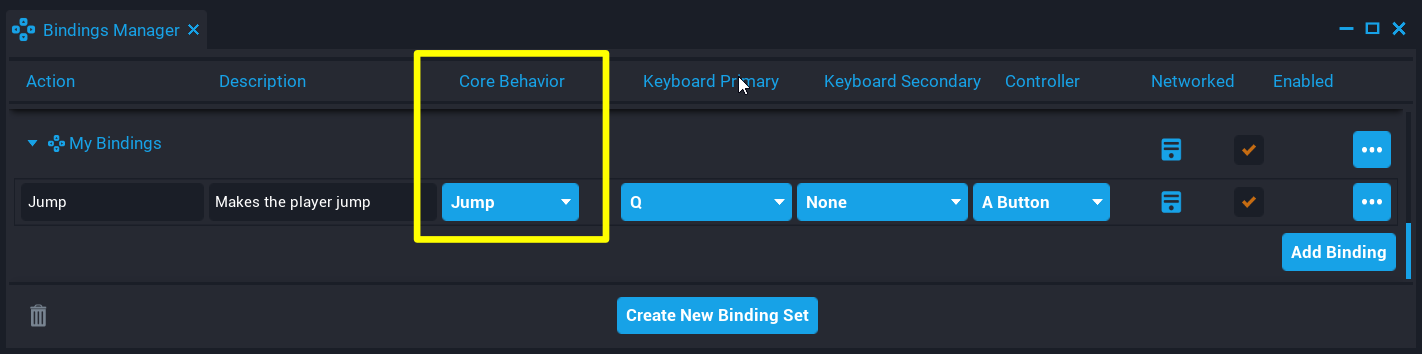
For example, setting the key Q to perform the Jump action.
- Add Basic Binding.
- Select Jump from the Core Behavior drop down.
- Set the letter Q from the Keyboard Primary drop down.

When a new binding is added, the action name and description can be set. The action name should be something that identifies what this action does. This identifier can be used in Lua to determine which action triggered the event.
Bindings support a secondary key and controller input. Meaning that the player can perform an action using 2 different keys or use controller input (that is a button).
Core Behavior
When creating a binding, a Core Behavior needs to be selected so that the Binding Set knows which action to perform when the binding is triggered. When a Core Behavior is selected, the binding will get auto-filled with the default Core values for the keyboard and controller inputs.
Binding Types
There are 3 different types of bindings that can by created.
| Binding Type | Description |
|---|---|
| Basic Binding | Basic bindings have a value of either 0 or 1, pressed or released, and act like buttons. |
| Axis Binding | Axis bindings can take on any number value, not just 0 or 1, like a gamepad trigger held half way, or how fast the mouse's scroll wheel is moving up or down. |
| Directional Binding | Directional bindings are for 2D controls like moving the player or rotating the camera and have a Vector2 value. |
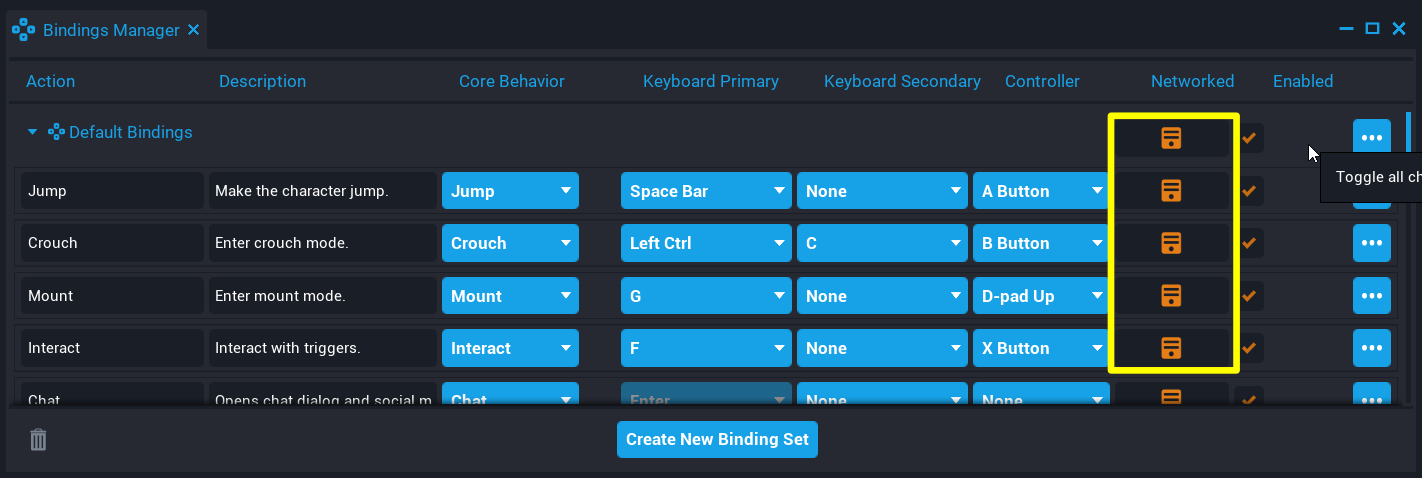
Networked Bindings
Bindings can be networked so the value and input events are replicated to the server. Replicated bindings allow creators to use specific Input functions and events in a server script using Lua. Networked bindings can be set individually or for all child bindings of a Binding Set in the Bindings Manager.
For information on which events and functions work with networked bindings, see the Input API.
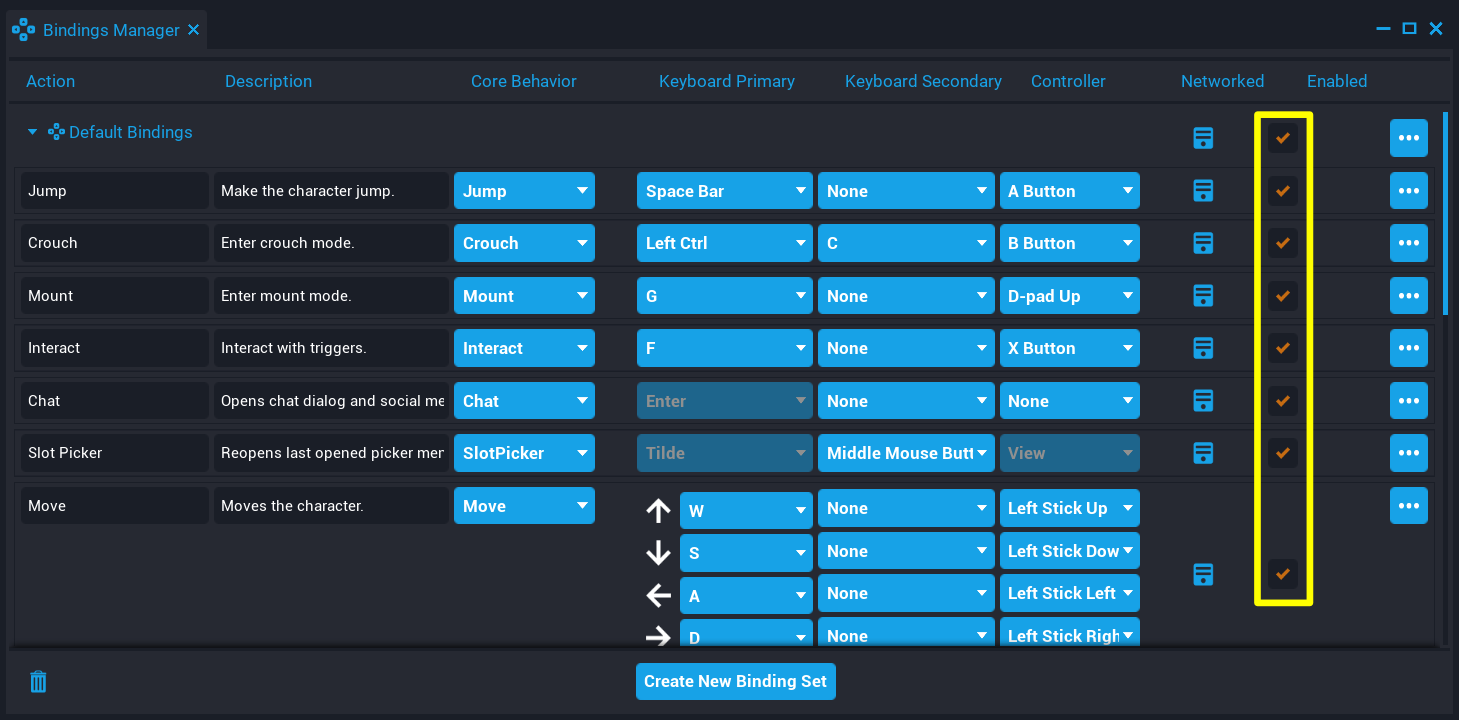
Enable / Disable Bindings
Bindings can be enabled or disabled at startup by clicking on the checkbox in the Enable column of the Bindings Manager window. These can be controlled by a Lua script that can also enable and disable an action.
Input.EnableAction("Jump")
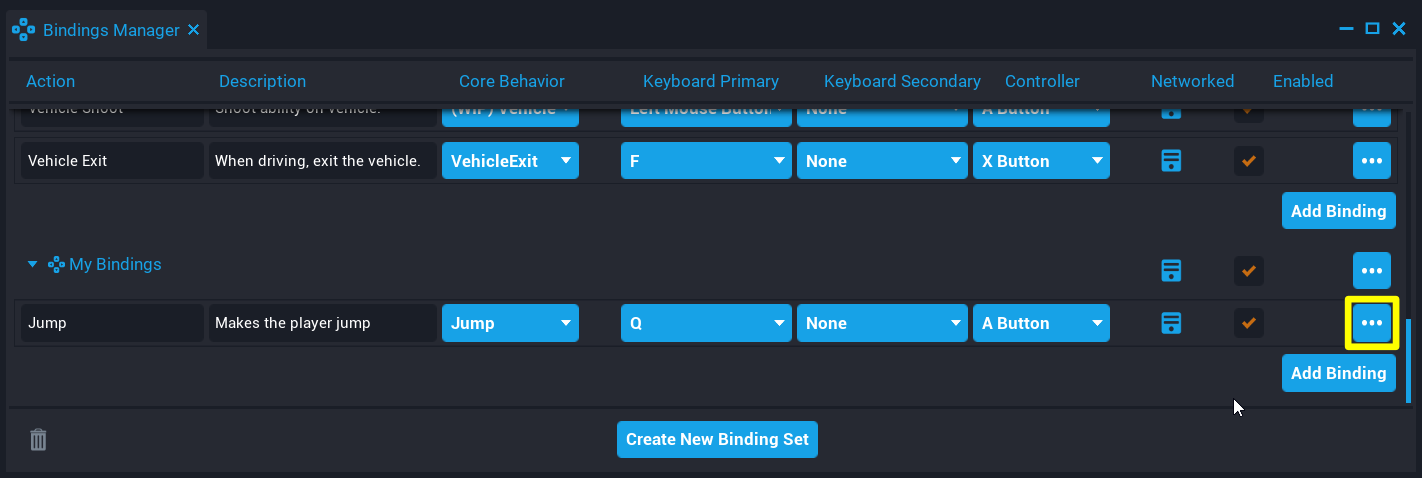
Deleting a Binding
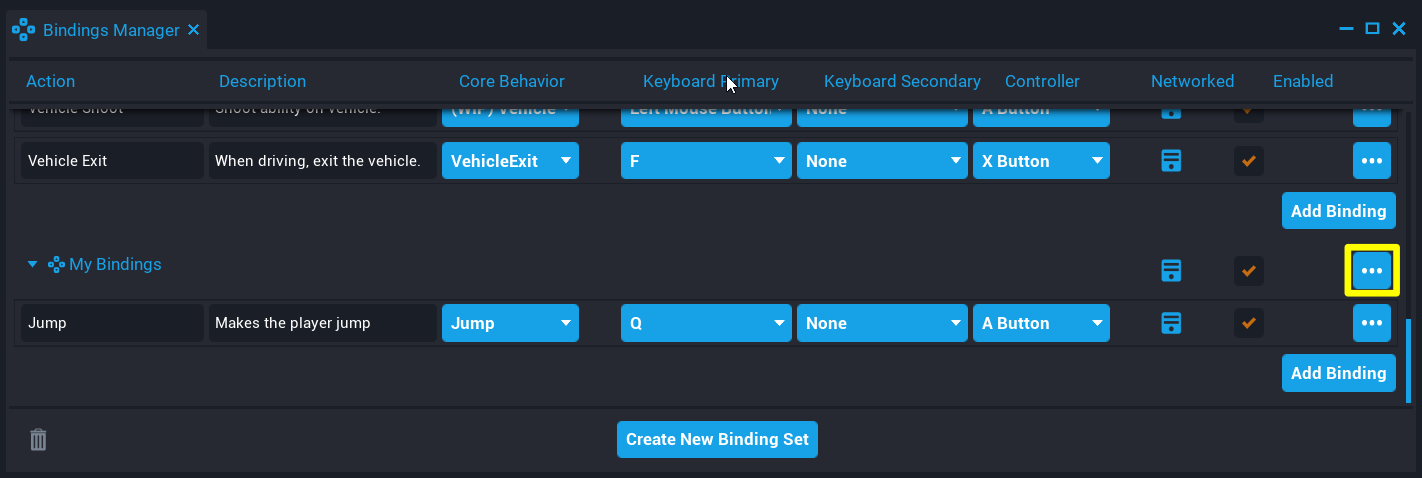
A binding can be deleted from a Binding Set by accessing the options menu and selecting Delete Binding from the Bindings Manager window.
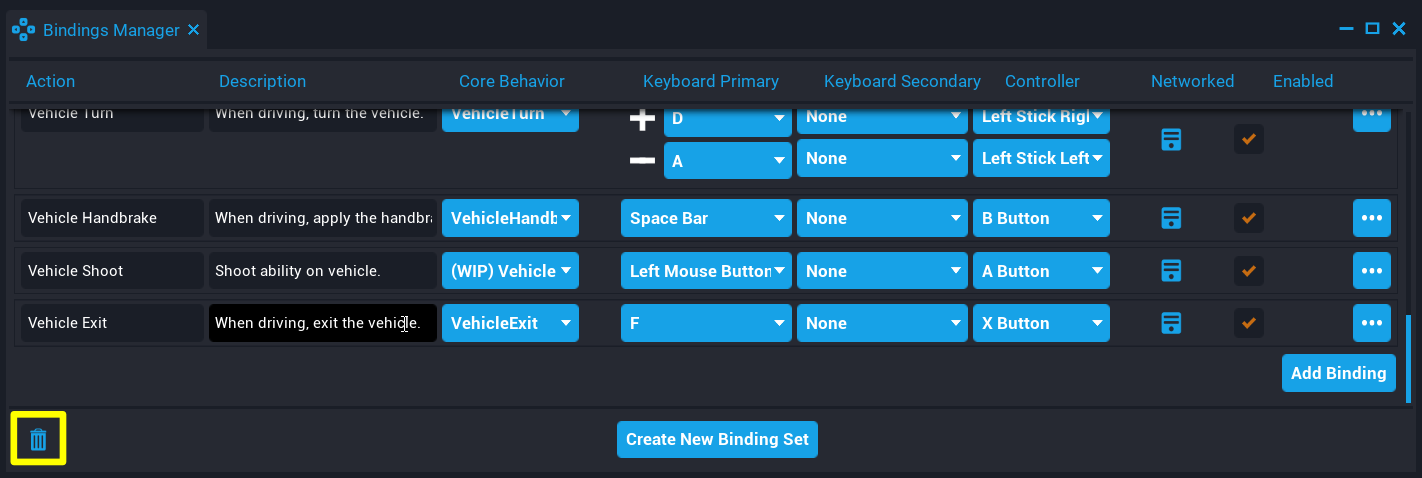
Deleting a Binding Set
A Binding Set can be deleted from My Binding Sets in Project Content, or by selecting Delete Binding Set from the option menu in the Bindings Manager window.
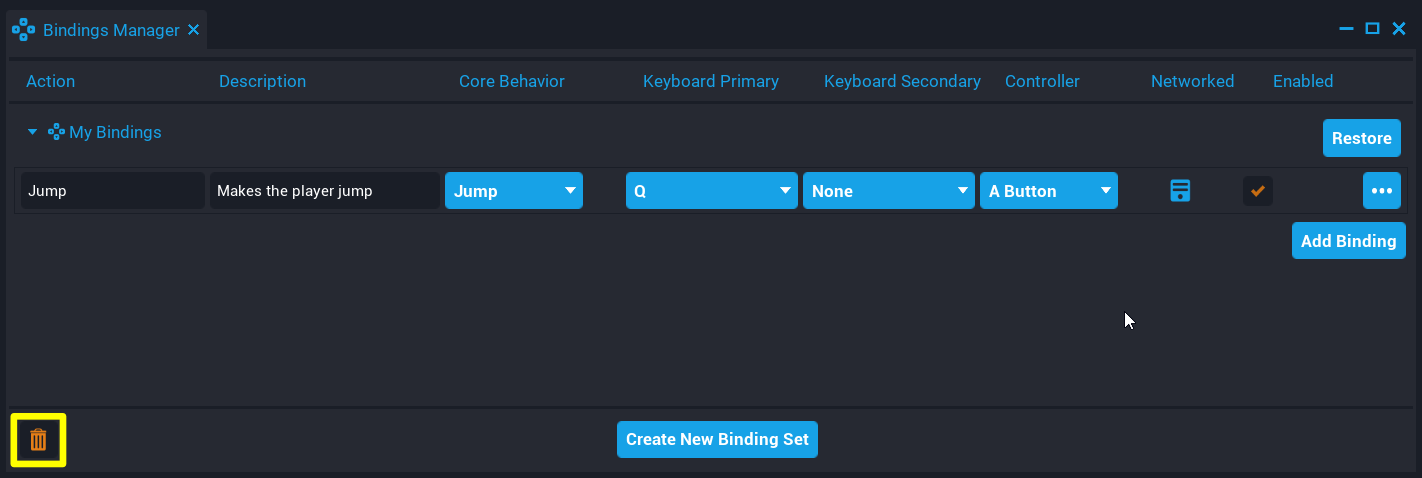
Restoring a Deleted Binding Set
Any Binding Sets that have been deleted in the current editor session, can be restored by viewing the list of deleted Binding Sets.
A deleted Binding Set can be restored by clicking on the Restore button.
Using Input Functions and Events
The Input namespace has various functions and events that can be used with bindings from Binding Sets.
For example, listening for when an action has been pressed using actionPressedEvent.
local function OnActionPressed(player, action, value)
    print("Pressed", player, action, value)
end

Input.actionPressedEvent:Connect(OnActionPressed)
See the Input API for all the events and functions.
Detecting Input Type
Detecting what input device a player is using, can allow creators to customize the UI depending on the player's input device.
The input type can be determined by checking the returned value from Input.GetCurrentInputType and Input.inputTypeChangedEvent. For example, detecting the player input device to customize the UI depending on if they input device is keyboard or controller.
Example Code
-- Client side script

local TRIGGER = script:GetCustomProperty("Trigger"):WaitForObject()
local VEHICLE = script:GetCustomProperty("Vehicle"):WaitForObject()

-- Interact panel UI
local INTERACT_MESSAGE = script:GetCustomProperty("InteractMessage"):WaitForObject()

-- Controller UI (child of interact panel)
local CONTROLLER = script:GetCustomProperty("Controller"):WaitForObject()

-- Keyboard UI (child of interact panel)
local KEYBOARD = script:GetCustomProperty("Keyboard"):WaitForObject()

-- Updated if player is inside the trigger
local insideTrigger = false

-- Updated if the player is in the vehicle
local isInVehicle = false

-- Get input device
local inputDevice = Input.GetCurrentInputType()

-- Simulate switching input device to controller
Task.Spawn(function()
    inputDevice = 1
    print("Input device switched to controller")
end, 5)

-- On overlap of the vehicle trigger, change the interact UI based on
-- the input device
TRIGGER.beginOverlapEvent:Connect(function(trigger, obj)
    if Object.IsValid(obj) and obj:IsA("Player") then
        insideTrigger = true

        INTERACT_MESSAGE.visibility = Visibility.FORCE_ON

        if inputDevice == InputType.KEYBOARD_AND_MOUSE then
            KEYBOARD.visibility = Visibility.FORCE_ON
            CONTROLLER.visibility = Visibility.FORCE_OFF
        else
            KEYBOARD.visibility = Visibility.FORCE_OFF
            CONTROLLER.visibility = Visibility.FORCE_ON
        end
    end
end)

-- When leaving the trigger, turn off the UI
TRIGGER.endOverlapEvent:Connect(function(trigger, obj)
    if Object.IsValid(obj) and obj:IsA("Player") then
        insideTrigger = false

        INTERACT_MESSAGE.visibility = Visibility.FORCE_OFF

        if inputDevice == InputType.KEYBOARD_AND_MOUSE then
            KEYBOARD.visibility = Visibility.FORCE_OFF
        else
            CONTROLLER.visibility = Visibility.FORCE_OFF
        end
    end
end)

-- Detect the action pressed
Input.actionPressedEvent:Connect(function(player, action, value)
    if action == "Interact" and insideTrigger then
        if isInVehicle then
            isInVehicle = false

            -- Tell server script to remove the driver
            Events.BroadcastToServer("RemoveDriver")
        else
            isInVehicle = true

            -- Tell server script to set the driver
            Events.BroadcastToServer("SetDriver")
        end
    end
end)
Migrating an Existing Project to use Binding Sets
Projects created before Binding Sets were added to Core can be migrated to use Binding Sets, here's how to convert to a Binding Set.