Create a Racing Game in Core
Overview
The Racing Framework provides everything you need to start making your first racing game in Core. This tutorial will give you the tools you need to modify the cars and racetracks in the Racing Framework.

Create a Racing Framework Game
To get started, use the CREATE menu to make a new project
Open the NEW PROJECT Menu

- With Core open, click the CREATE tab in the top menu bar.
- Click the NEW PROJECT tab at the top of the CREATE menu.
Select the Racing Framework
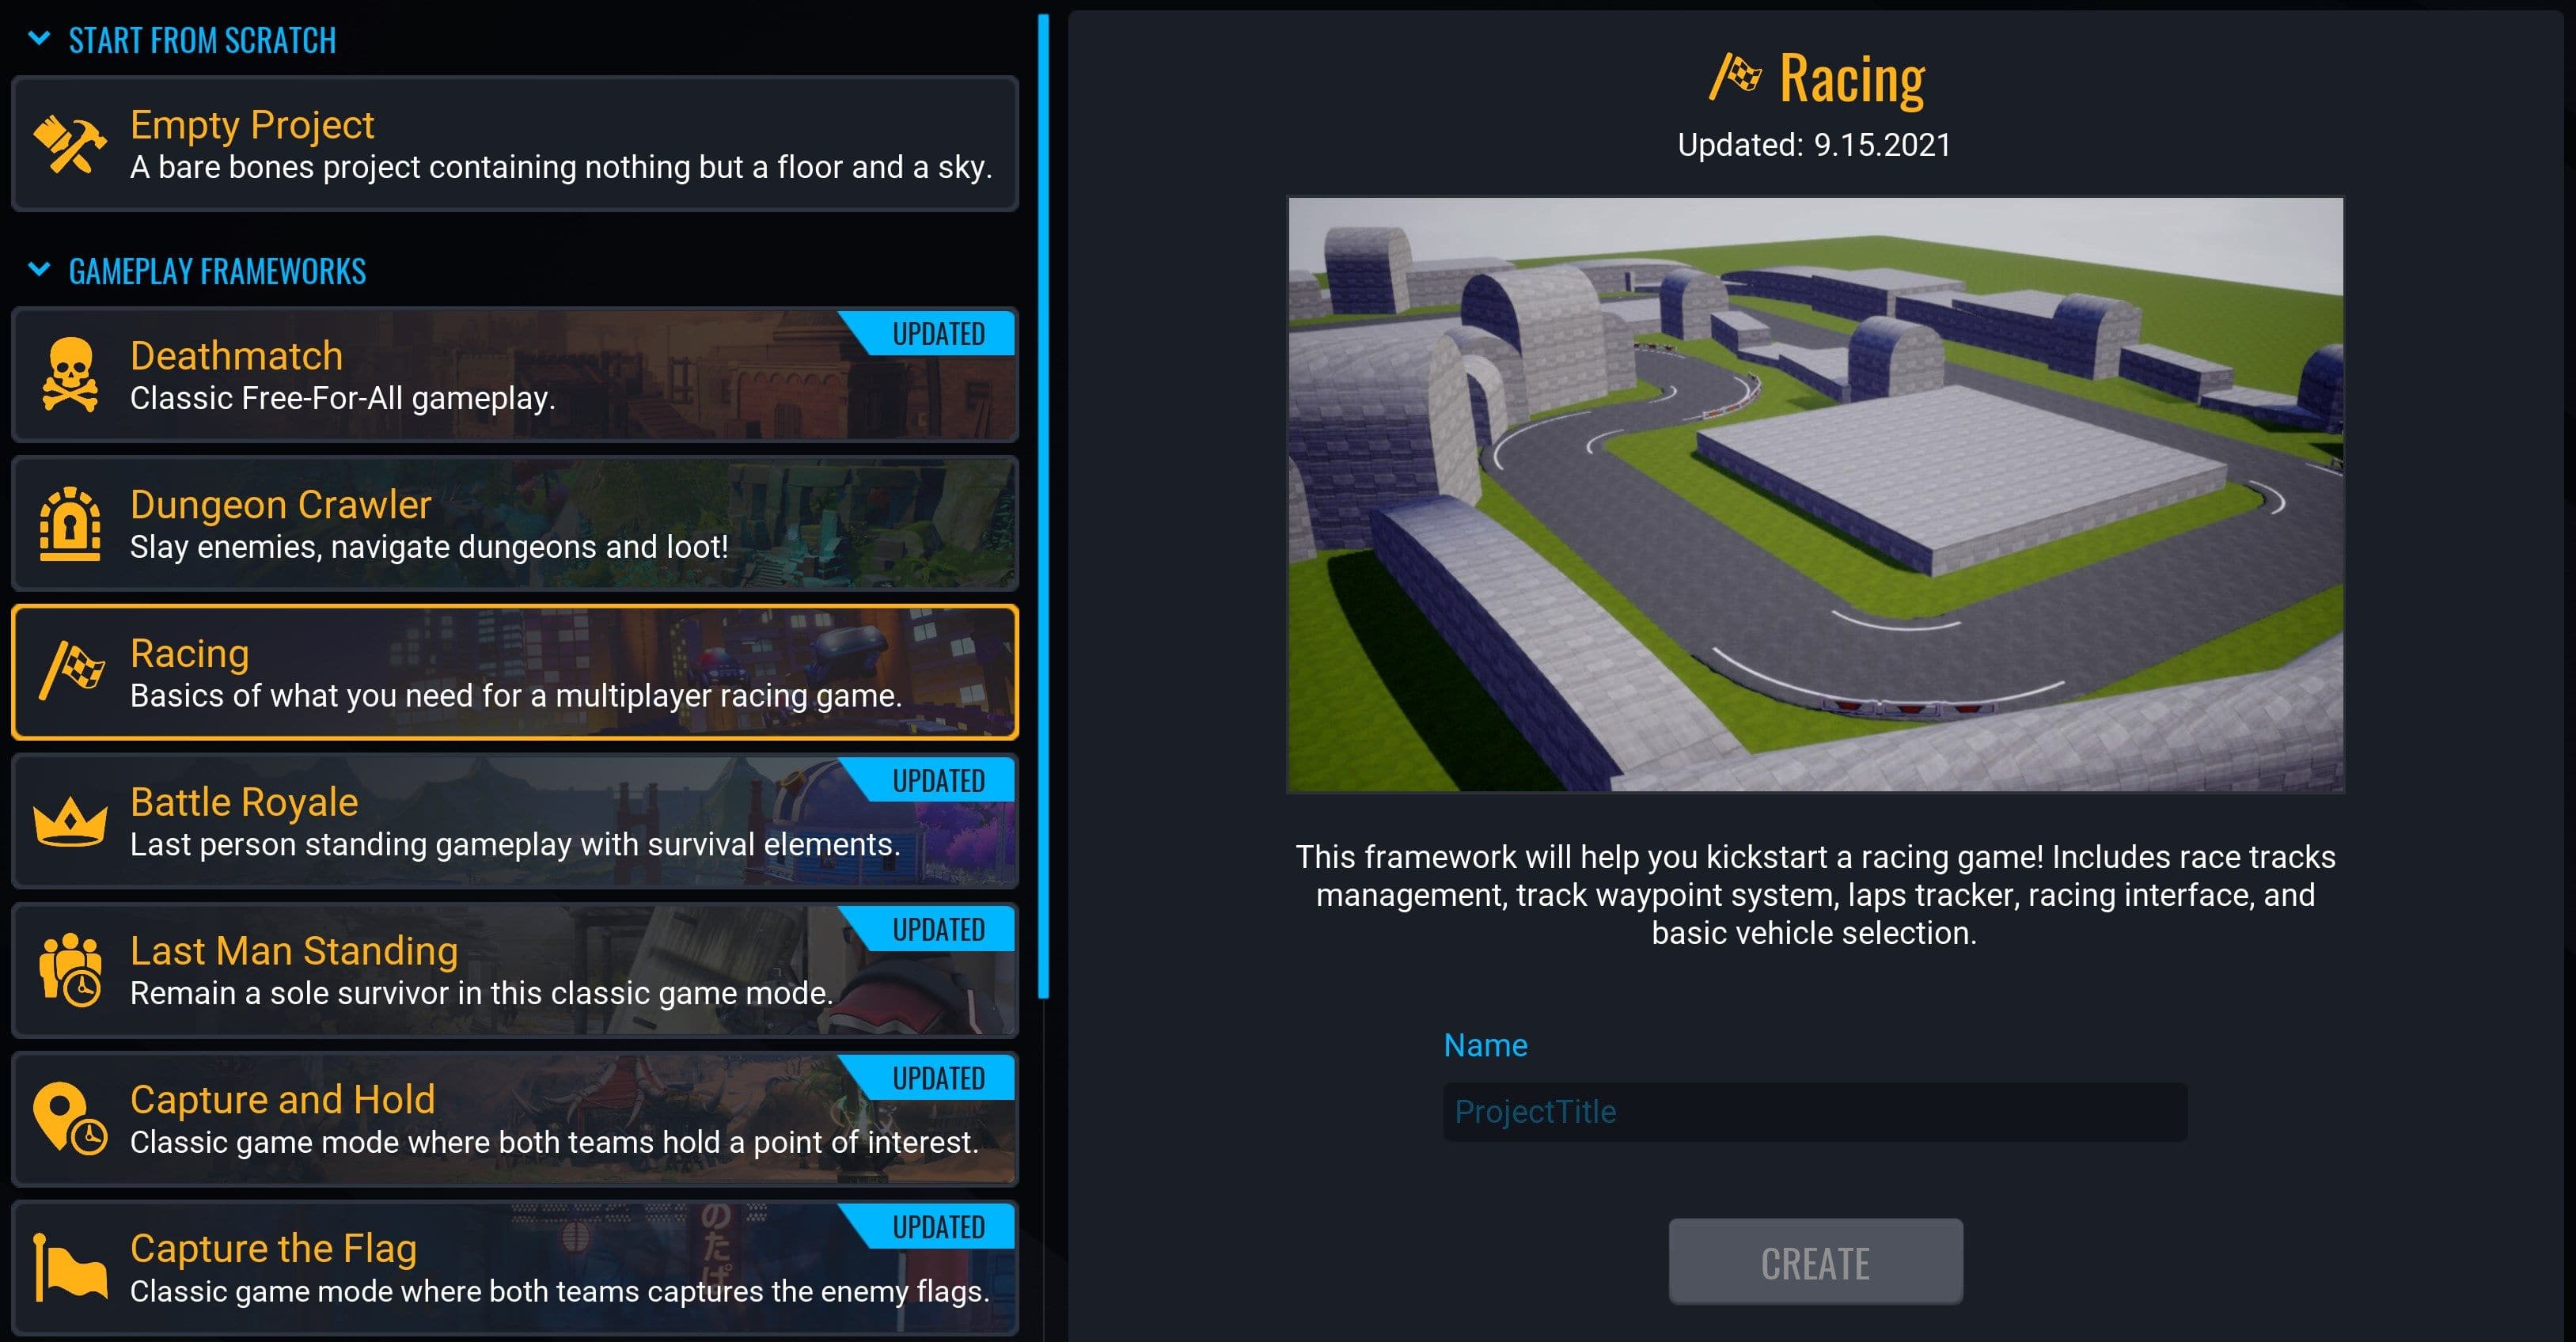
- In the GAMEPLAY FRAMEWORKS section, select Racing.
- In the right side panel, name your project.
- Click CREATE.
Testing the Racing Framework
After creating your Racing Framework game you should play it to make sure that everything is working. Playing the Racing Framework game will also familiarize you with how the system functions.
Changing the Truck
In this section you will modify the Pickup Truck from the Racing Framework. The modifications you will make to the Pickup Truck can also be made to any other cars in the Racing Framework.
Adding the Pickup Truck into the scene
You first need to add the Pickup Truck into your hierarchy before you can modify the Pickup Truck template.
- Open the Project Content window
- Click on My Templates
- Click on the Cars tab
- Drag the Pickup Truck template into your Main Viewport
You will now see a list of car templates in the bottom window. These car templates are the same cars that you can find in the car selection area in your Racing Framework game.
Changing the Look of the Pickup Truck
Opening up the Truck
The first change to the Pickup Truck will change what the Pickup Truck looks like. You will be adding a cone on top of the Pickup Truck. Using the following steps you can change the Pickup Truck to look like anything.
Tip
Click on the
 icon or the
  icon to switch the view type in the Project Content, Core Content or Imported Content windows.
You first need to expand the Pickup Truck in your hierarchy so that you can see what is inside of it. Click on the triangle next to the word Pickup Truck to open up the Pickup Truck in your hierarchy.
- Open the Client Context folder
- Open the folder named Geo
- Open the folder named Body
- Open the Urban Car - Truck Lifted 01 (Prop) folder
- Open the folder named Body
The Body folder contains all of the pieces that make up the main body of the Pickup Truck. You will be adding a cone into this Body folder.
Finding and Adding the Cone
You now will have to find the cone asset from the Core Content window.
- Click on the Core Content window
- Click on 3D Objects tab
- Click on the Art Objects tab
- Click on the Props tab
- Click on the Urban tab
- Click on the Street tab
Now that you have found the cone asset. Drag the cone asset into the Body folder of your Pickup Truck. You will see a popup window that says DEINSTANCE TEMPLATE at the top. Click on the Deinstance button.
The Pickup Truck (networked) should now be a teal color. The teal color indicates that an object in your hierarchy is a deinstanced template.
The cone is now a part of the Pickup Truck. The cone was given the name Road Cone 01 (client). Move the Road Cone 01 (client) on top of the Pickup Truck.
What is a Template?
A template is similar to a blueprint. A template tells Core what objects need to be instantiated when we spawn the template. You have been modifying the Pickup Truck template. In the Racing Game Kit in you can see multiple instances of this Pickup Truck template. One instance of the Pickup Truck template can be found at the vehicle select area. At the start of the race, one Pickup Truck template is spawned for each player that selects the Pickup Truck.
To modify a template you first have to deinstance the template (a deinstanced template will be teal). You deinstanced the Pickup Truck template so that you could modify the Pickup Truck.
Updating the Pickup Truck Template
After you have modified the template you have to update it. One way to update a template is to select a teal object from the template and press the  icon.
icon.
Another way to update a template is to right click on one of the teal objects and select Update Template From This from the pop up menu.
You must save your project after updating a template. You can save your project by pressing Ctrl + S.
Modifying the Speed of the Pickup Truck
You are not limited to only changing the appearance of the Pickup Truck. You can also modify different properties of the Pickup Truck. Specifically, you will be changing the Max Speed and Acceleration property of the Pickup Truck to increase the speed of the Pickup Truck.
To modify the Max Speed and Acceleration properties, you have to click on the object named Pickup Truck (networked). You can find the Pickup Truck (networked) in your Hierarchy window.
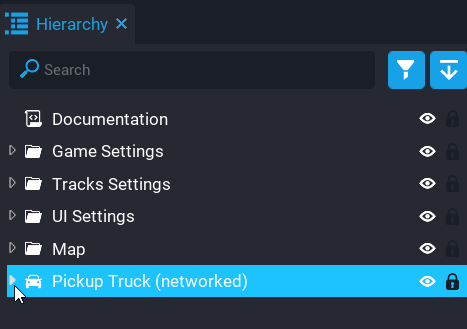
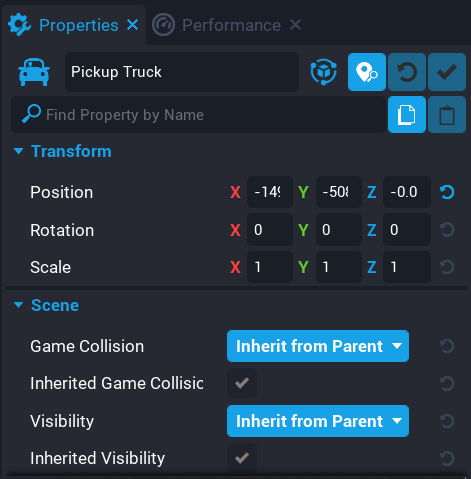
Now that you have the Pickup Truck (networked) selected. In the bottom right of your screen you will see a window named Properties. The Properties window contains all of the different properties of an object.
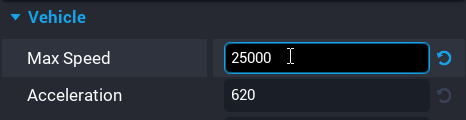
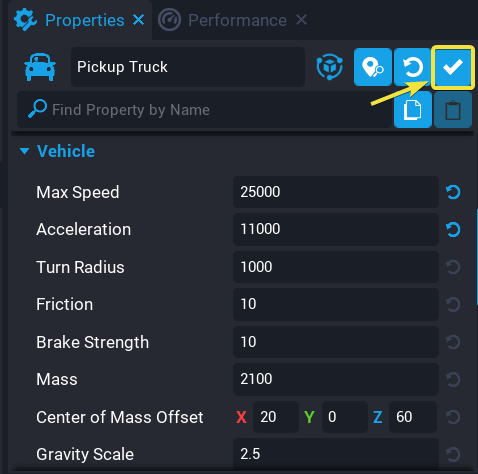
You need to scroll down in the Properties window until you a section named Vehicle. In the Vehicle section you will see two properties Max Speed and Acceleration. The Max Speed property controls the maximum speed of the Pickup Truck. The Acceleration property of the Pickup Truck controls the acceleration of the Pickup Truck.
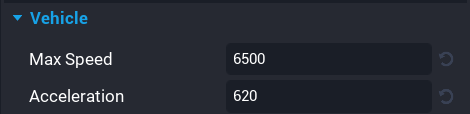
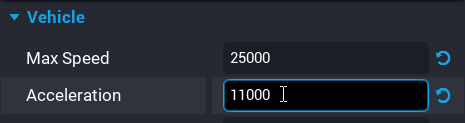
Double click number 6500. Then, input a value of 25000 for the Max Speed property. Next, set the Acceleration property to 11000.
Finally, click on the update template icon. This will update the Pickup Truck template to reflect the changes you made.
You can now delete the Pickup Truck (networked) object in your hierarchy by clicking on it and pressing the ++backspace** key.
Changing the Track
This section will cover the steps necessary to modify any track from the Racing Framework.
Changing the Track Shape
In this section, you will be removing a portion of the track to change its shape.
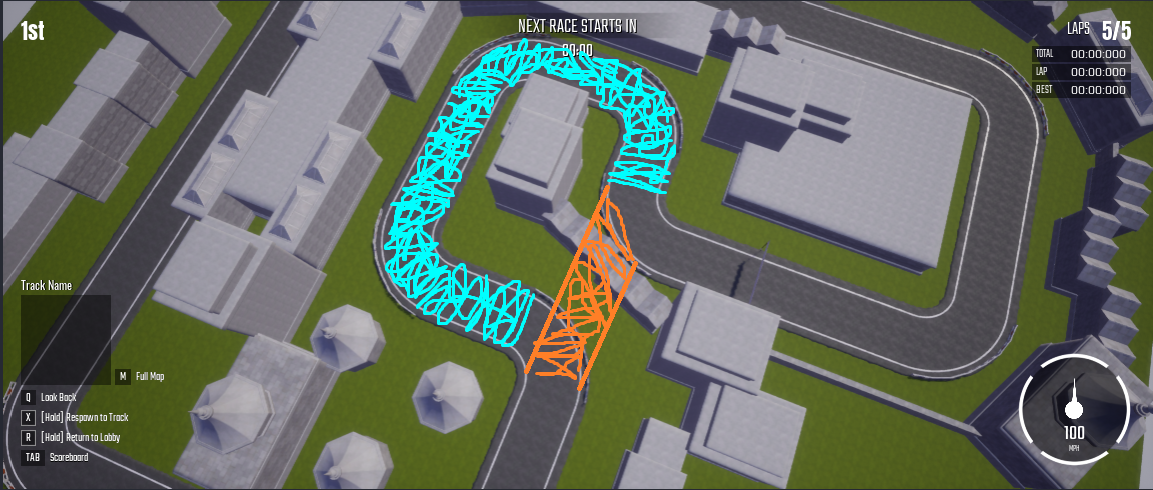
The Blue section represents track that will be removed from the minimap. The Orange section represents the track section that you will add to the track and minimap.
You will use the hotkey actions below to do the following:
- Delete the buildings on top of the detour
- Remove the Railings on the Curves of the track
- Reposition the track to fill in the Orange section
Use the Left Button of the mouse to select objects in the Main Viewport.
Press the Backspace key to delete selected objects.
Hold the Ctrl key to select multiple objects in the Main Viewport.
Use the Ctrl + W keys to duplicate a selected object or group of selected objects.
Press the E key to display the rotate tool for a selected object.
Press the W key to display the positioning tool for a selected object.
First, you will remove the buildings that are on top of the Orange section.
Next, you will remove the railings on the track.
Next, you will rotate the curved track.
Next, you will reposition and duplicate the track section to fill in the gap.
Changing the Minimap
After you have modified the track, you will need modify the minimap to display your changes to the track.
Tip
Press the V key to show the Trigger objects in the Main Viewport.
The minimap uses waypoints to determine how to draw the minimap. Each waypoint is represented by a Trigger object. Changing the position of each Trigger will change the rotation and position of each road drawn on the minimap.
You will first need to open the folder named Waypoints that contains the triggers used as waypoints.
- Open the Tracks Settings folder
- Open the Track 1 folder
- Open the Track 1 Settings folder
- Open the Waypoints folder
The minimap will draw a road that connects each Trigger to the Trigger below it in the Hierarchy window. You will be removing 3 waypoints from the Waypoints folder so that the minimap draws your modified version of the track.