UI Text Entry Validation
Overview
In this tutorial, you will learn how to validate the text that players can enter into a UI Text Entry Box to make sure only certain values or lengths can be entered in the field. Validation can be done for numeric values and text. For example, a player that can enter a name for a pet they own might need restrictions on the length of the name, and what characters or words are used.
- Completion Time: ~30 minutes
- Skills you will learn:
- Maximum length validation.
- Basic censored word system.
- Numbers only validation.
Get Started
To follow along with the tutorial, you will need some UI that contains a UI Text Entry Box that will be used by a script for validation tests, and a basic script to enable the cursor when in play mode.
Create UI
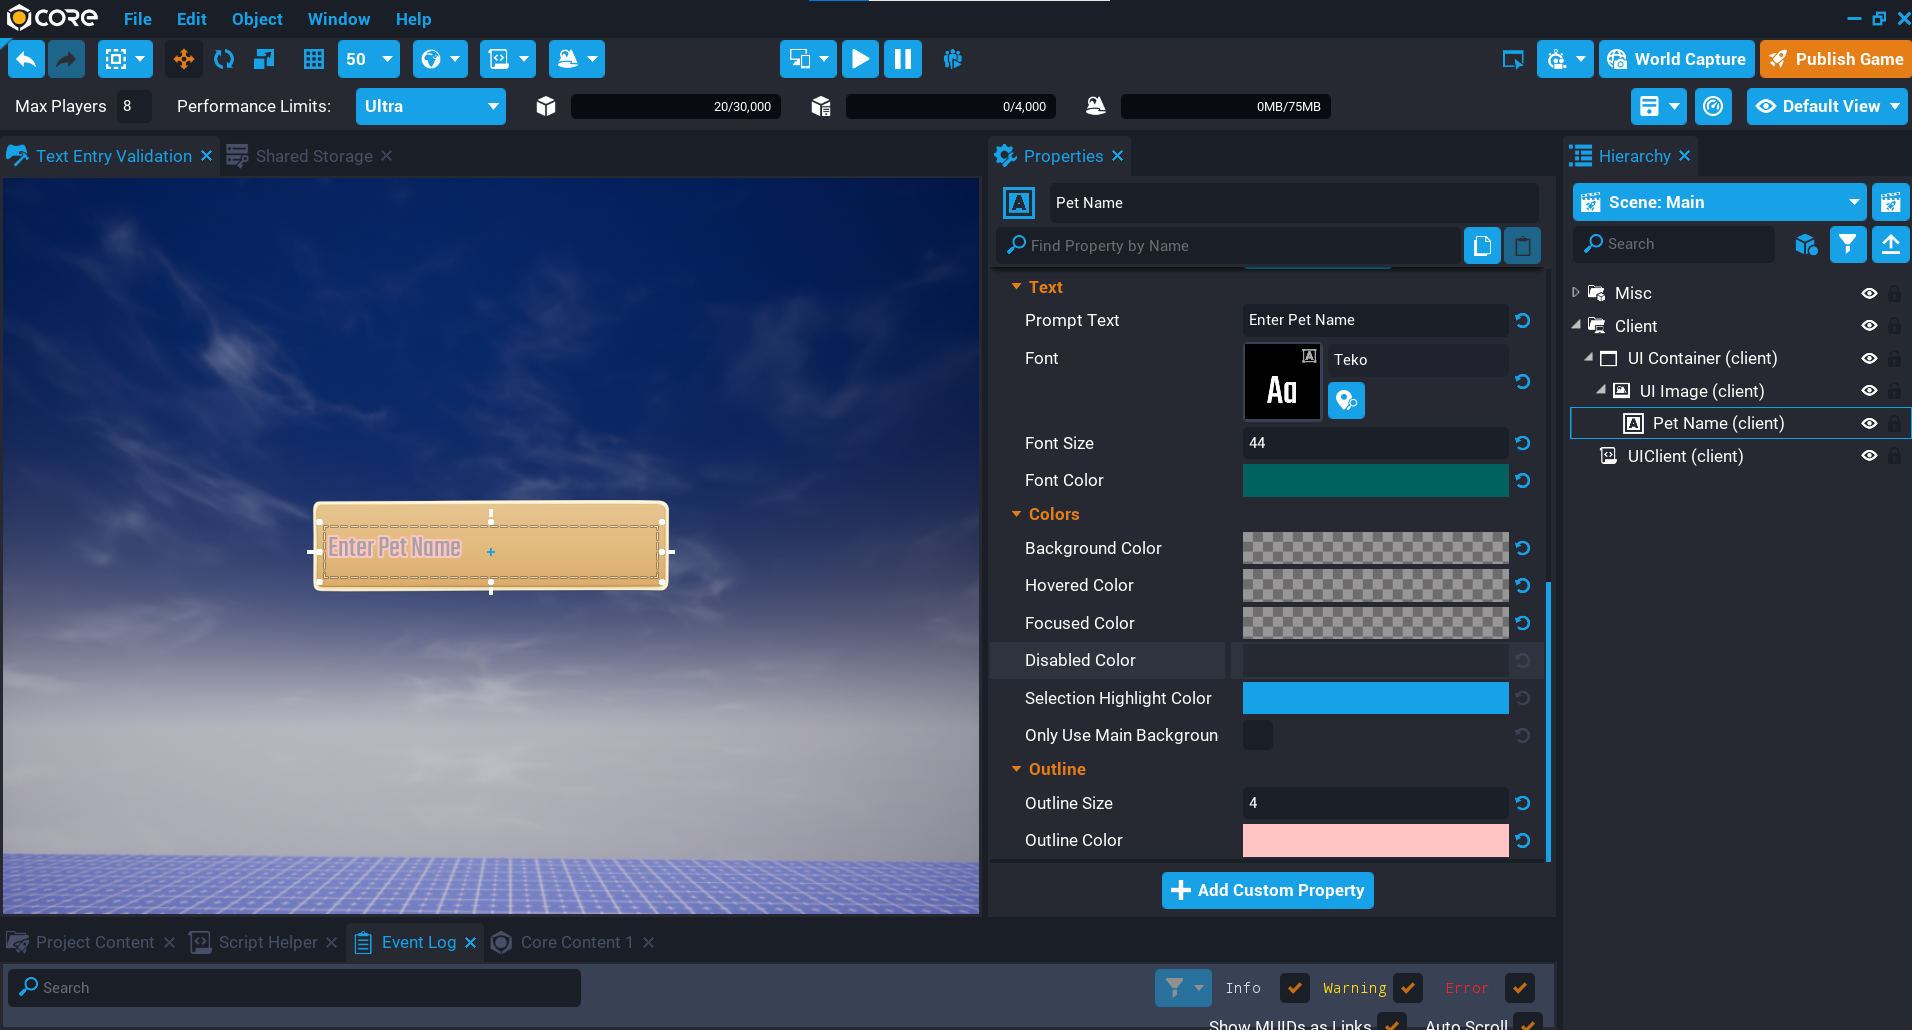
In the screenshot below, some basic UI has been created using a brush created from an image in the media library. Create your UI, and add a UI Text Entry Box object.
Create UIClient Script
A script can be created to show the cursor, and allow it to interact with UI.
Create a new script called UIClient and place it in a Client Context group. Open up the script and place the following code into it.
UI.SetCanCursorInteractWithUI(true)
UI.SetCursorVisible(true)
Maximum Text Length
In this section, you will create a system that allows you to specify a maximum number of characters that are allowed to be used. This can be useful, for example limiting the length of a Pet name that the player can enter into the text entry box.
Create Counter UI
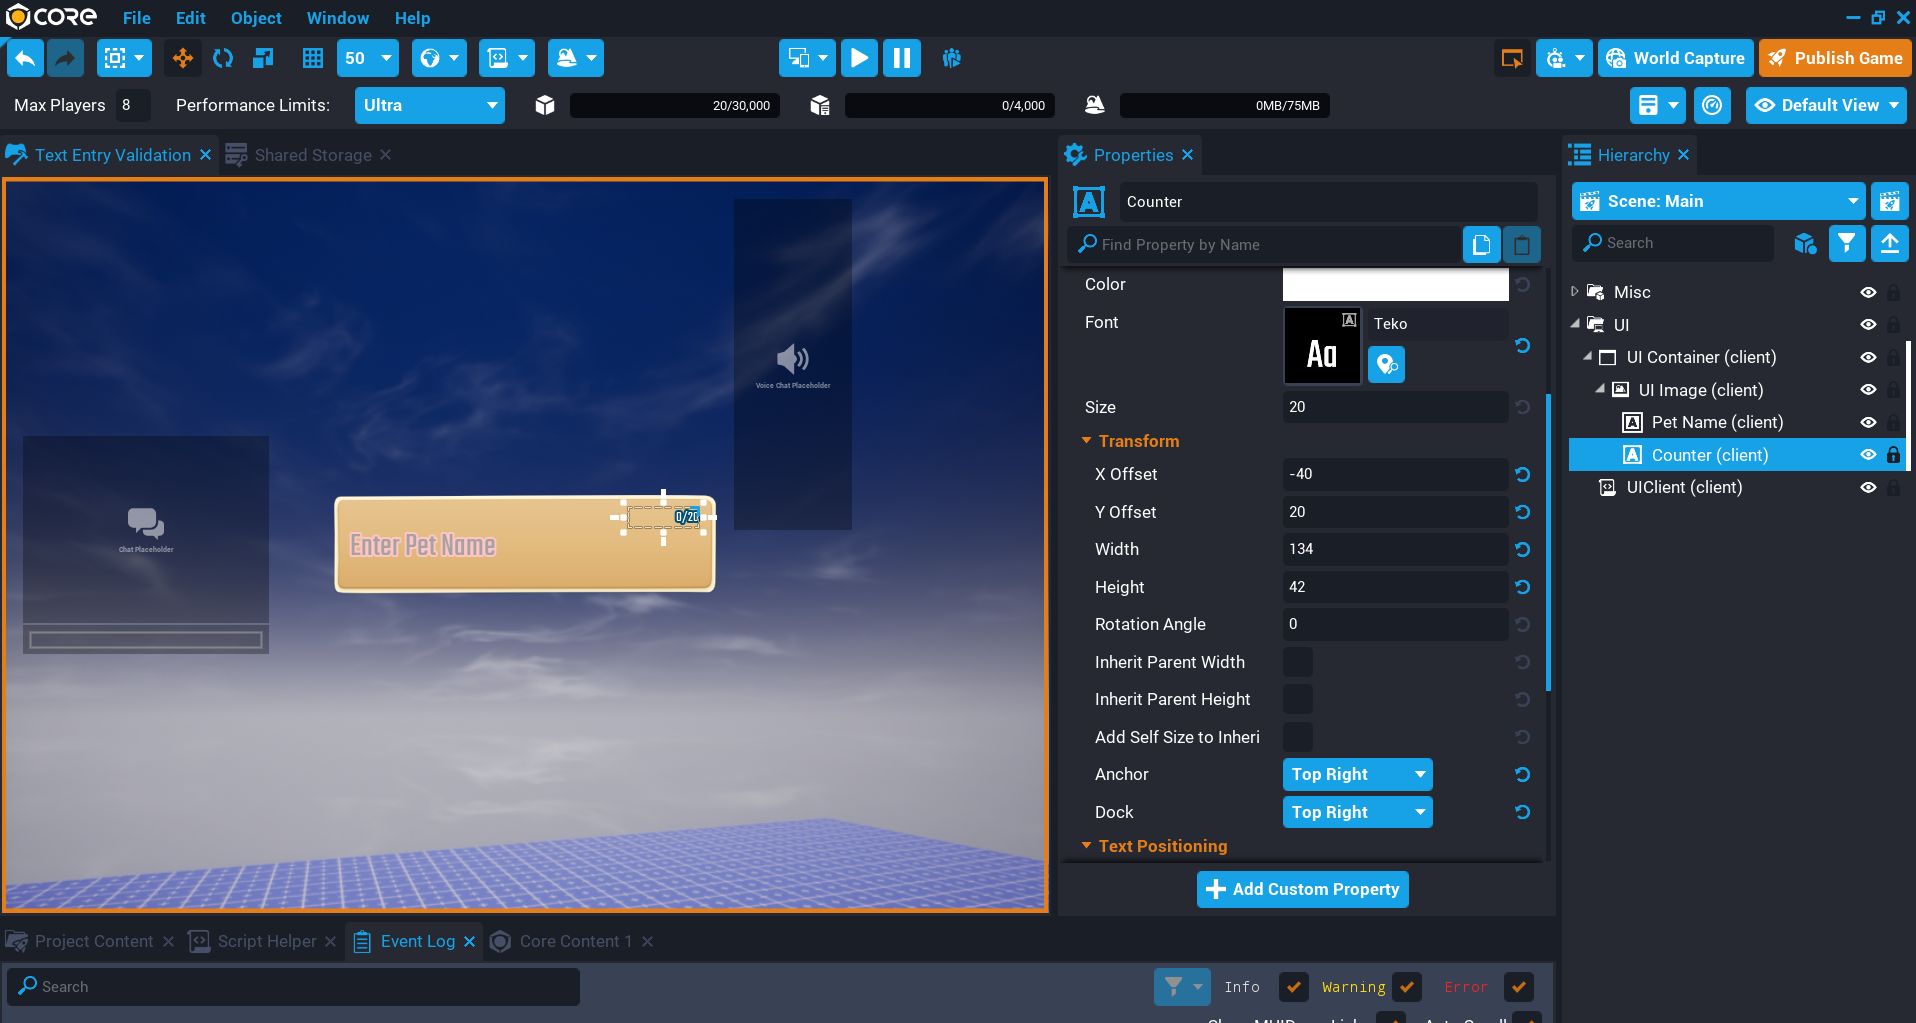
To provide some feedback to the player, we can create a UI Text object that will be updated from a script when the text of the text entry changes.
Create MaximumLengthClient Script
Create a new script called MaximumLengthClient and place it into the client context in the Hierarchy. This script will check the length of the text in the text entry box for the pet name, and make sure it doesn't exceed a certain number.
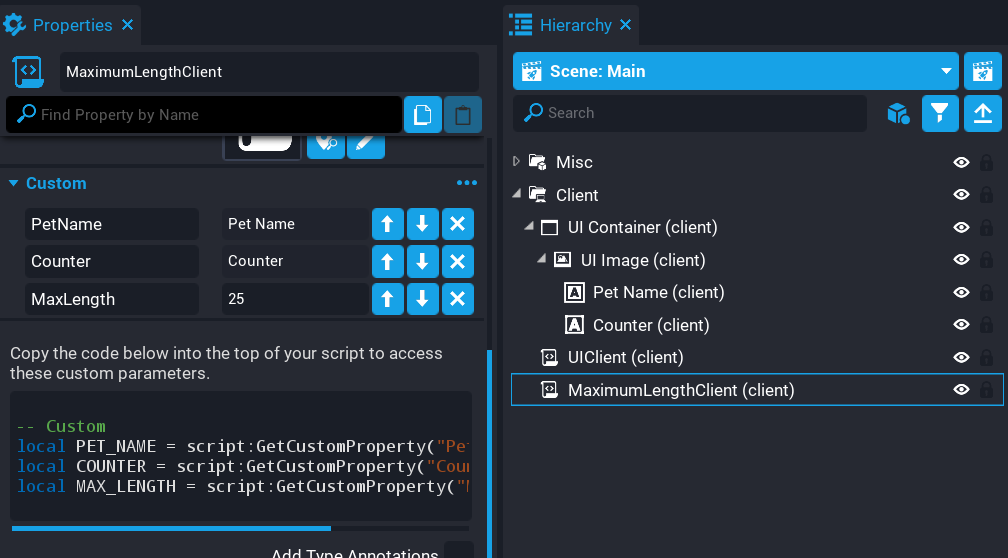
The script will need references to some objects and a custom property for the max length.
- Add the Pet Name text entry box object as a custom property.
- Add the Counter text object as a custom property.
- Add an Int custom property called
MaxLengthand set the value.
Add Variables
With the custom properties added, you will need references to them in the script. Add the following variables.
local PET_NAME = script:GetCustomProperty("PetName"):WaitForObject()
local COUNTER = script:GetCustomProperty("Counter"):WaitForObject()
local MAX_LENGTH = script:GetCustomProperty("MaxLength")
Create UpdateCounter Function
Create a function called UpdateCounter. This function will update the text for the COUNTER by checking the length of the pet name string. This will be called anytime the text for the pet name is changed or committed.
local function UpdateCounter()
    COUNTER.text = string.format("%s/%s", string.len(PET_NAME.text), MAX_LENGTH)
end
Create CheckLength Function
Create a new function called CheckLength. This function will check the text of the pet name any time there is a change or commit. Validation is done on the text parameter by checking the length of the string. If the length of the string is greater than MAX_LENGTH, then the PET_NAME text is modified so any characters that come after the MAX_LENGTH are discarded. Each time this function is called, the UpdateCounter is also called to update the counter for the player.
local function CheckLength(obj, text)
    local len = string.len(text)

    if len > MAX_LENGTH then
        PET_NAME.text = string.sub(text, 1, MAX_LENGTH)
    end

    UpdateCounter()
end
Connect Text Entry Box Events
Connect the two text entry box events. Each of these events will fire when either the text has changed, or it is committed.
PET_NAME.textChangedEvent:Connect(CheckLength)
PET_NAME.textCommittedEvent:Connect(CheckLength)
Call UpdateCounter Function
A call to UpdateCounter can be done so that it sets the correct max length value in the UI for the player to see.
UpdateCounter()
The MaximumLengthClient Script
MaximumLengthClient
local PET_NAME = script:GetCustomProperty("PetName"):WaitForObject()
local COUNTER = script:GetCustomProperty("Counter"):WaitForObject()
local MAX_LENGTH = script:GetCustomProperty("MaxLength")

local function UpdateCounter()
    COUNTER.text = string.format("%s/%s", string.len(PET_NAME.text), MAX_LENGTH)
end

local function CheckLength(obj, text)
    local len = string.len(text)

    if len > MAX_LENGTH then
        PET_NAME.text = string.sub(text, 1, MAX_LENGTH)
    end

    UpdateCounter()
end

PET_NAME.textChangedEvent:Connect(CheckLength)
PET_NAME.textCommittedEvent:Connect(CheckLength)

UpdateCounter()
Test the Game
Test the game by entering text into the Pet Name text entry box and making sure you can't go over the limit.
Censored Word List
In this section, you will create a new script that will handle censoring words that the player enters into the text entry box. For example, maybe a pet name can not have "Cat" in the name.
Create Word List Data Table
A data table will be used to store the words to find and replace in the UI text entry box.
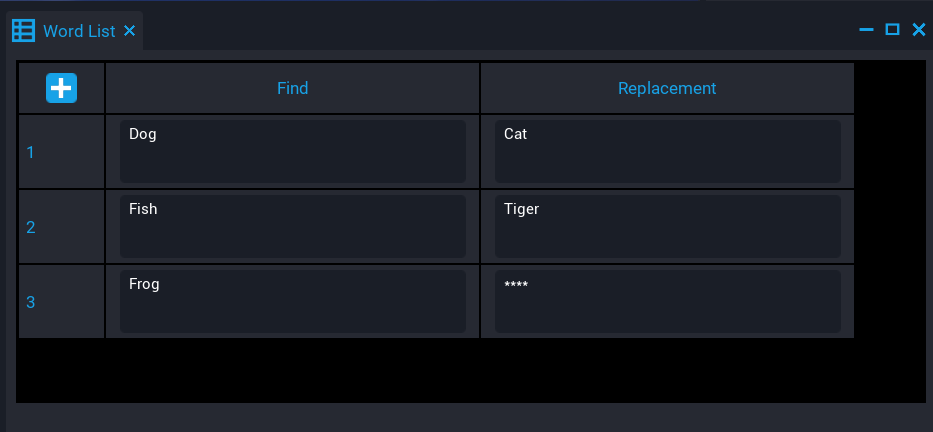
- Create a data table called
Word Listwith 2 columns. - For the first column, name it
Findand set the type tostring. - For the second column, name it
Replacementand set the type tostring. - Enter some words and replacements into the data table.
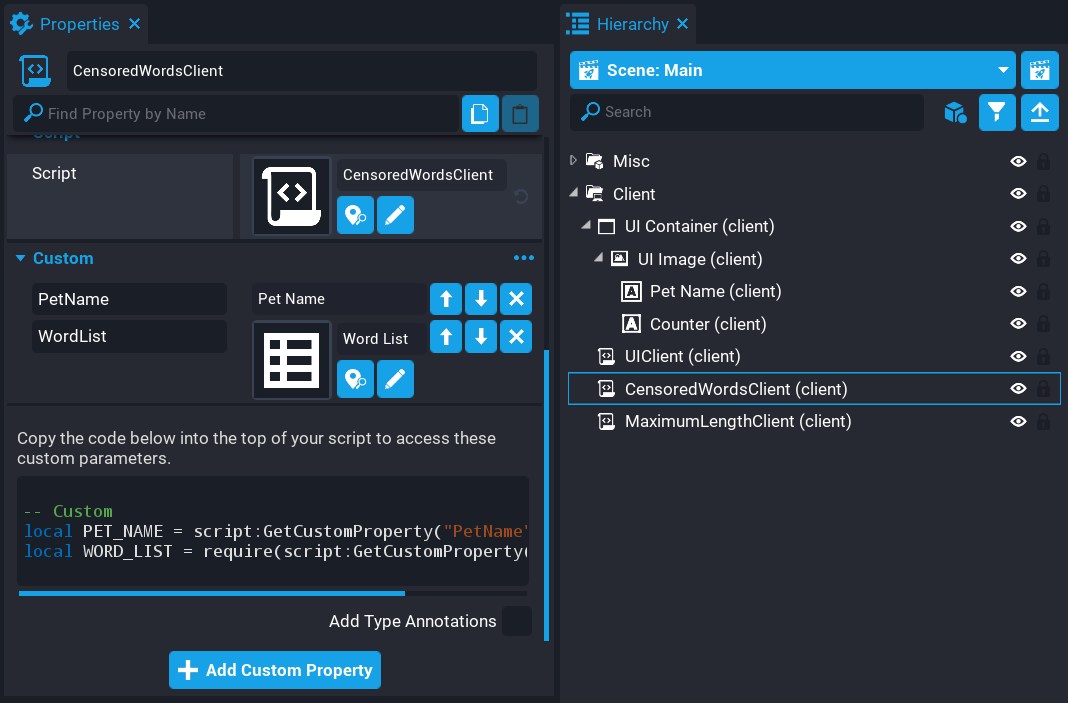
Create CensoredWordsClient Script
Create a new script called CensoredWordsClient and place it in the client context.
If you are following along with this tutorial, make sure to place the CensoredWordsClient script above the MaximumLengthClient script, otherwise, you will get some errors.
Add Custom Properties
The CensoredWordsClient script needs a reference to the Pet Name text entry box and the word list data table.
- Add the Pet Name object in the Hierarchy as a custom property.
- Add the Word List data table from Project Content as a custom property.
Add Variables
The CensoredWordsClient script will need references to the Pet Name text entry box and the Word List data table. Add the references to the script.
local PET_NAME = script:GetCustomProperty("PetName"):WaitForObject()
local WORD_LIST = require(script:GetCustomProperty("WordList"))
Create CensorWords Function
Create a function called CensorWords. This function will receive the text from the text entry box that will be used in the validation check. Looping through the WORD_LIST table, each word in the Find column can be checked against the text parameter. If there is a match, then the text is updated by replacing the found word with the replacement word. Finally, the PET_NAME text is updated with the modified text value.
local function CensorWords(obj, text)
    for index, row in ipairs(WORD_LIST) do
        text = string.gsub(text, row.Find, row.Replacement)
        text = string.gsub(text, string.lower(row.Find), row.Replacement)
    end

    PET_NAME.text = text
end
Connect Events
Connect the two text entry box events. Each of these events will fire when either the text has changed, or it is committed.
PET_NAME.textChangedEvent:Connect(CensorWords)
PET_NAME.textCommittedEvent:Connect(CensorWords)
The CensoredWordsClient Script
CensoredWordsClient
local PET_NAME = script:GetCustomProperty("PetName"):WaitForObject()
local WORD_LIST = require(script:GetCustomProperty("WordList"))

local function CensorWords(obj, text)
    for index, row in ipairs(WORD_LIST) do
        text = string.gsub(text, row.Find, row.Replacement)
        text = string.gsub(text, string.lower(row.Find), row.Replacement)
    end

    PET_NAME.text = text
end

PET_NAME.textChangedEvent:Connect(CensorWords)
PET_NAME.textCommittedEvent:Connect(CensorWords)
Test the Game
Test the game to make sure the words are replaced correctly.
Numbers Only
In this section, we make it so that the player can only enter numbers into the Text Entry Box. If the character being entered is not a number, then it will not show up.
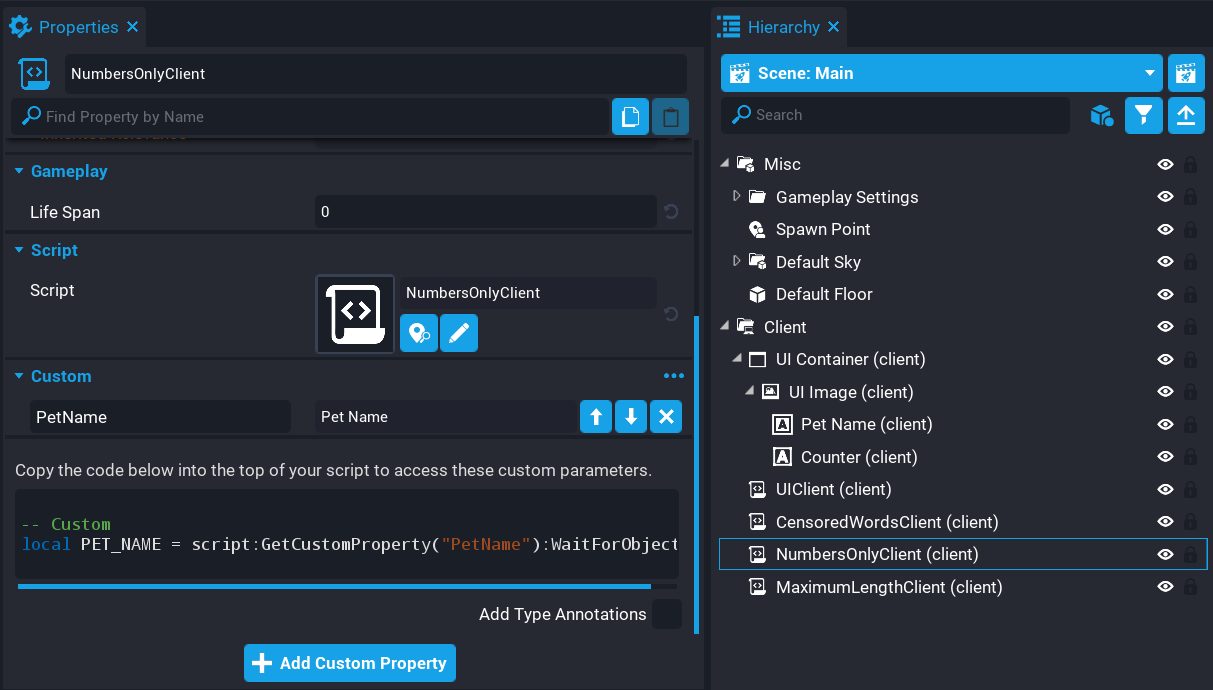
Create NumbersOnlyClient Script
Create a new script called NumbersOnlyClient and place it in the client context.
If you are following along with this tutorial, make sure to place the NumbersOnlyClient script above the MaximumLengthClient script, otherwise, you will get some errors.
Add Custom Properties
The NumbersOnlyClient script needs a reference to the Pet Name text entry box.
- Add the Pet Name object in the Hierarchy as a custom property.
Add Variables
The NumbersOnlyClient script will need references to the Pet Name text entry box.
local PET_NAME = script:GetCustomProperty("PetName"):WaitForObject()
Create CensorWords Function
Create a function called NumbersOnly. This function will receive the text from the text entry box that will be used in the validation check. It will check for any character that is not a number. If it is not a number character, then it will be removed from the text.
local function NumbersOnly(obj, text)
    if string.find(text, "%D") then
        text = string.gsub(text, "%D", "")
    end

    PET_NAME.text = text
end
Connect Events
Connect the two text entry box events. Each of these events will fire when either the text has changed, or it is committed.
PET_NAME.textChangedEvent:Connect(CensorWords)
PET_NAME.textCommittedEvent:Connect(CensorWords)
The NumbersOnlyClient Script
NumbersOnlyScript
local PET_NAME = script:GetCustomProperty("PetName"):WaitForObject()

local function NumbersOnly(obj, text)
    if string.find(text, "%D") then
        text = string.gsub(text, "%D", "")
    end

    PET_NAME.text = text
end

PET_NAME.textChangedEvent:Connect(NumbersOnly)
PET_NAME.textCommittedEvent:Connect(NumbersOnly)
Test the Game
Test the game to make sure only numbers can be entered into the text entry box for the Pet Name.
Summary
The UI Text Entry Box has a lot of use cases. In this tutorial, we only covered 3 ways to handle validation, but there is so much more you can do with it.
Consider creating a validation API that could cover a wide range of things that can optionally be used in your game for Text Entry Boxes.
Learn More
UI Text Box Entry | UI Editable Text API | Pet Namer Tutorial