Chat Hook Tutorial - Create RPG-style Speech Bubbles
The Chat namespace allows creators to get the text that players type into the chat window, and to use it to make other code happen, or modify it before it goes into the chat window. There are several examples of ways you can use this to create commands or modify speech in the Chat section of the Core API reference, but in this tutorial, we will be making RPG-style speech bubbles that pop up when players enter characters into chat, similar to what you might see in Core World.
Setting Up the Chat Hooks
Hooks are very similar to built-in Core Events, because they are fired automatically by Core when certain behavior happens, but are different from events because you can modify a value before the event is over. In the case of Chat, you can find out that a player typed into chat, find out what they typed, and then change the message or choose not to put it in chat at all.
Create a New Client Script
This script will be a client-side script that takes the information from the chat window.
Info
Chat hooks can be accessed from both client and server scripts. To write messages in the chat, however, use a client script if it should be seen only by the player who initiated the chat, and a server script if you need to send a message to multiple players.
-
Press the Script
 button and select Create New Script. Name it
 SpeechBubbleScript. -
Right click in the Hierarchy and select Create Network Context... and New Client Context.
-
Find the script you created in the Project Content window and drag it into your new Client Context folder.
-
Double click the script to open it.
Setup a Chat Hook and Function
To start, we'll create a function that connects to the Chat.receiveMessageHook and prints the data to the Event Log.
Add this code to the client script that you created.
function printChatMessage(player, data)
    print(player.name .. " said " .. data.message)
end

Chat.receiveMessageHook:Connect(printChatMessage)
Test the Hook
- Make sure the Event Log window is open, to see the
printoutput. - Save your script, press the Play button to start a local preview.
- Press Enter to open the chat window, and type a message.
You should see your username and the message you wrote print in the Event Log.
Change the Message
The useful thing about hooks is not only getting the data about an event, but also being able to change it. Try these two experiments:
Add the line data.message = "Something entirely different!" after the print, like this:
function printChatMessage(player, data)
    print(player.name .. " said " .. data.message)
    data.message = "Something entirely different"
end

Chat.receiveMessageHook:Connect(printChatMessage)
Start a preview and test the chat. Your print message should stay the same, but the text in chat should be changed.
Info
If you want to look for specific words or patterns in the chat message, this Lua pattern-matching tutorial teaches how to use find, match and gmatch to search through strings of text.
Changing the Message to Nothing
If you change the message property of the data you get from the chat hook to an empty sting, it should display nothing at all to the chat. This can be very useful if you want to create user commands that can be done in chat, or use the chat window to get text input from the user.
Test this out by changing "Something entirely different" to "".
function printChatMessage(player, data)
    print(player.name .. " said " .. data.message)
    data.message = ""
end

Chat.receiveMessageHook:Connect(printChatMessage)
Creating a Speech Bubble
There are a number of ways to create a container to hold speech bubbles. In Core World, these are made using UI positioned on the screen near a player. In this tutorial, we will create them using World Text. This allows you to customize their appearance with the full range of materials and 3D shapes in Core.
Add a World Text to the Project
- In Core Content find the World Text object, and drag it into the scene.
- Right click the World Text in the Hierarchy and select New Group Containing This.
- Name the Group
SpeechBubbleTemplate.
Create a Custom Property and a Template
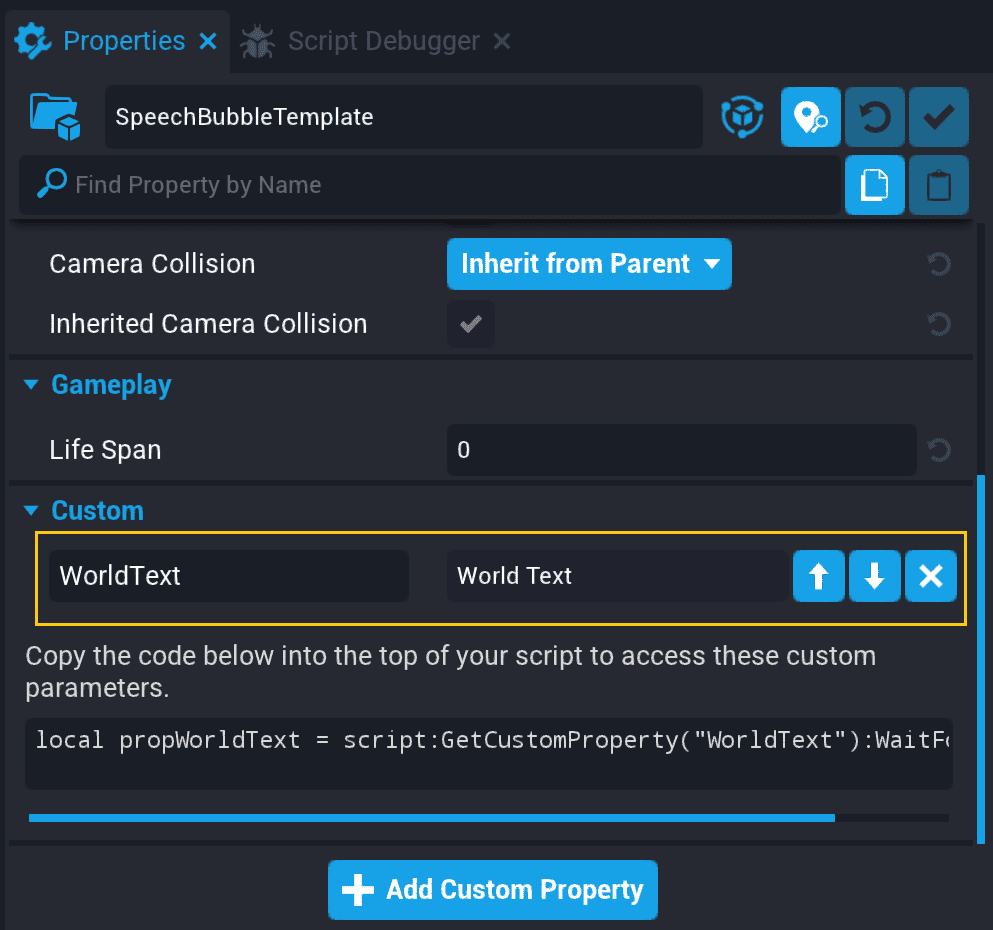
To make easy to access the text part of the speech bubble, regardless of the text you add later, we will add the text as a custom property on the parent group.
- With SpeechBubbleTemplate selected, open the Properties window.
- Open the SpeechBubbleTemplate folder, and find the World Text inside of it.
- Click and drag the World Text onto the Add Custom Property panel in the properties of Speech Bubble Template.
- Right click Speech Bubble Template and select Create New Template From This.
You can now delete the copy of Speech Bubble Template in the Hierarchy. It should be saved in the My Templates section of Project Content
Using the Speech Bubble to Show Text
To finish out the project, we will spawn this new template to show the text that players type into chat above their heads.
Add the Template as a Custom Property
- Select your SpeechBubbleScript in the Hierarchy and open the Properties window.
- In Project Content, find SpeechBubbleTemplate, and drag it onto the Add Custom Property panel of SpeechBubbleScript.
Add a Variable Reference to the Template
From here, we'll delete all the experimental code we previously wrote in the script, and replace it code to spawn the speech bubble, and put the player's message in it.
-
Copy the variable text generated by adding the SpeechBubbleTemplate as a custom property. It should look like this:
local propSpeechBubbleTemplate = script:GetCustomProperty("SpeechBubbleTemplate") -
Open the SpeechBubbleScript, select all its contents, and delete them.
- Past the variable reference to the speech bubble in the first line of the script.
Spawn the Template when a Player Chats
Make a SpawnSpeechBubble function and connect it to the Chat.receiveMessageHook to spawn the template
local propSpeechBubbleTemplate = script:GetCustomProperty("SpeechBubbleTemplate")

function SpawnSpeechBubble(player, data)
    -- spawn the text bubble
    local bubble = World.SpawnAsset(propSpeechBubbleTemplate)
end

Chat.receiveMessageHook:Connect(SpawnSpeechBubble)
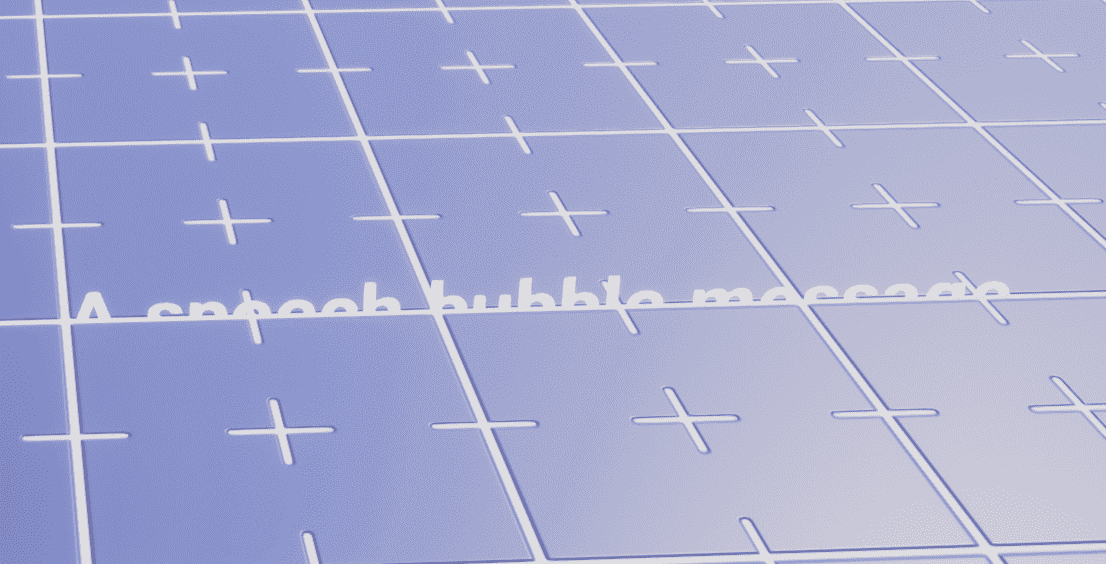
Start a preview, type a message into chat, and press Enter to test the speech bubble spawn. It should show up, but at the world origin of (0, 0, 0).
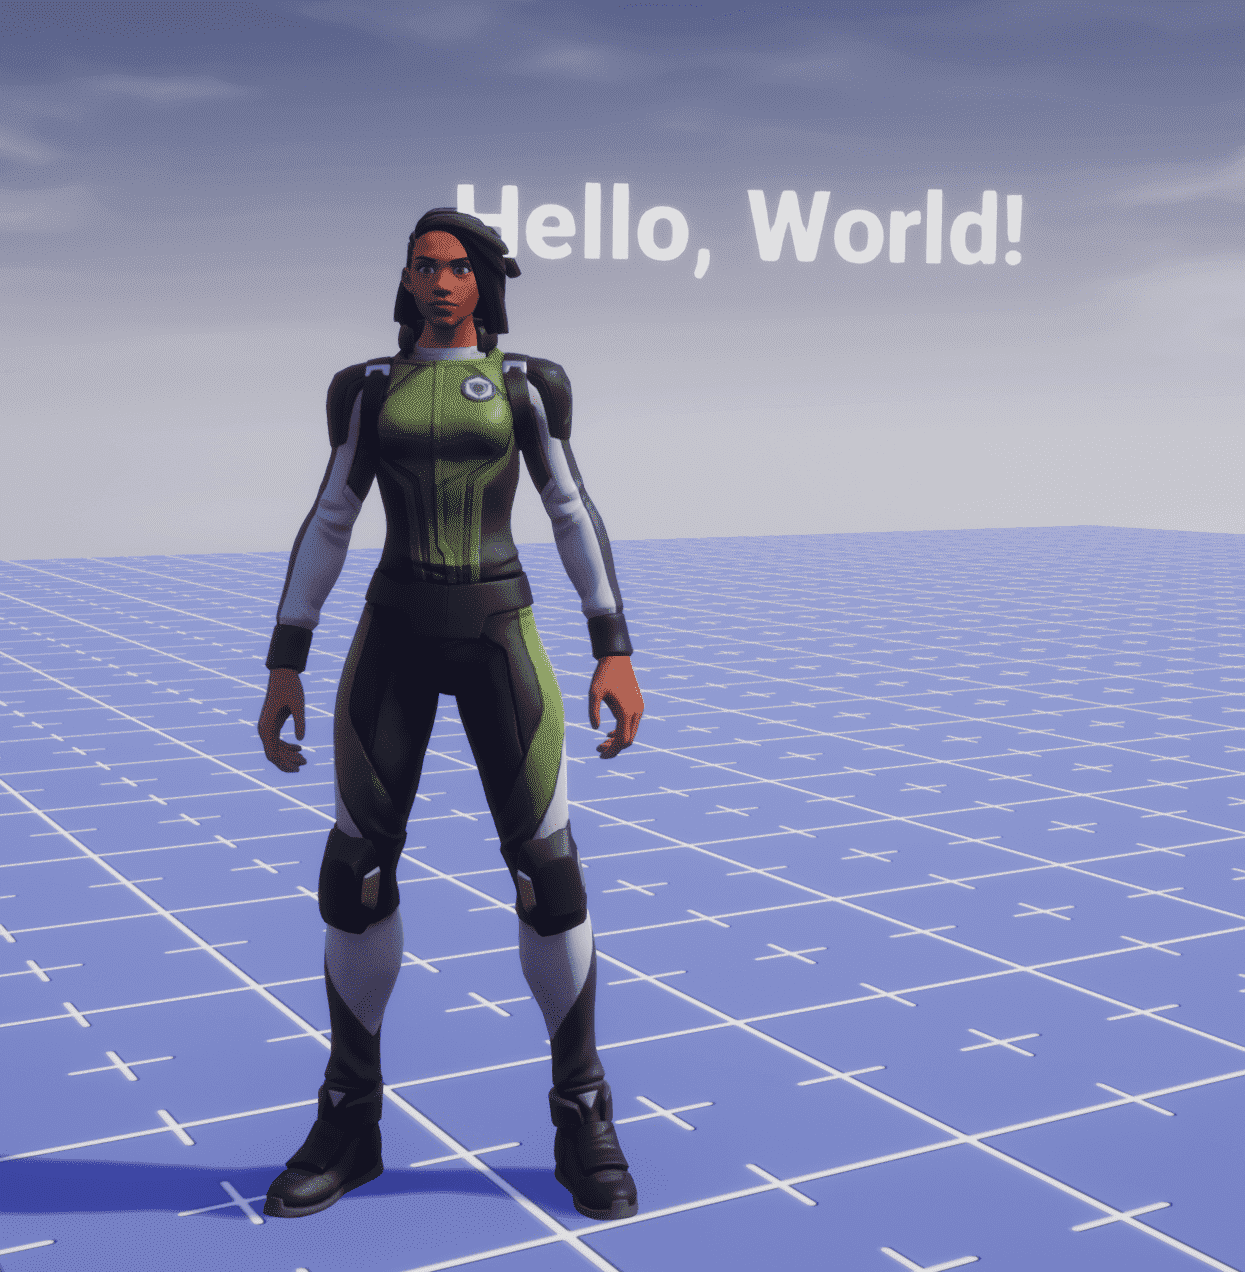
Spawn the Template Over the Player's Head
The next step is to make the chat appear over the player who chatted head, and face the screen for whoever is reading it.
Add these lines after the speech bubble is spawned, in the SpawnSpeechBubble function:
local newBubblePosition = player:GetWorldPosition() + Vector3.UP * 100 -- 100 up from wherever the player is

bubble:SetWorldPosition(newBubblePosition)
bubble:LookAtLocalView() -- magical function to make things face the screen!
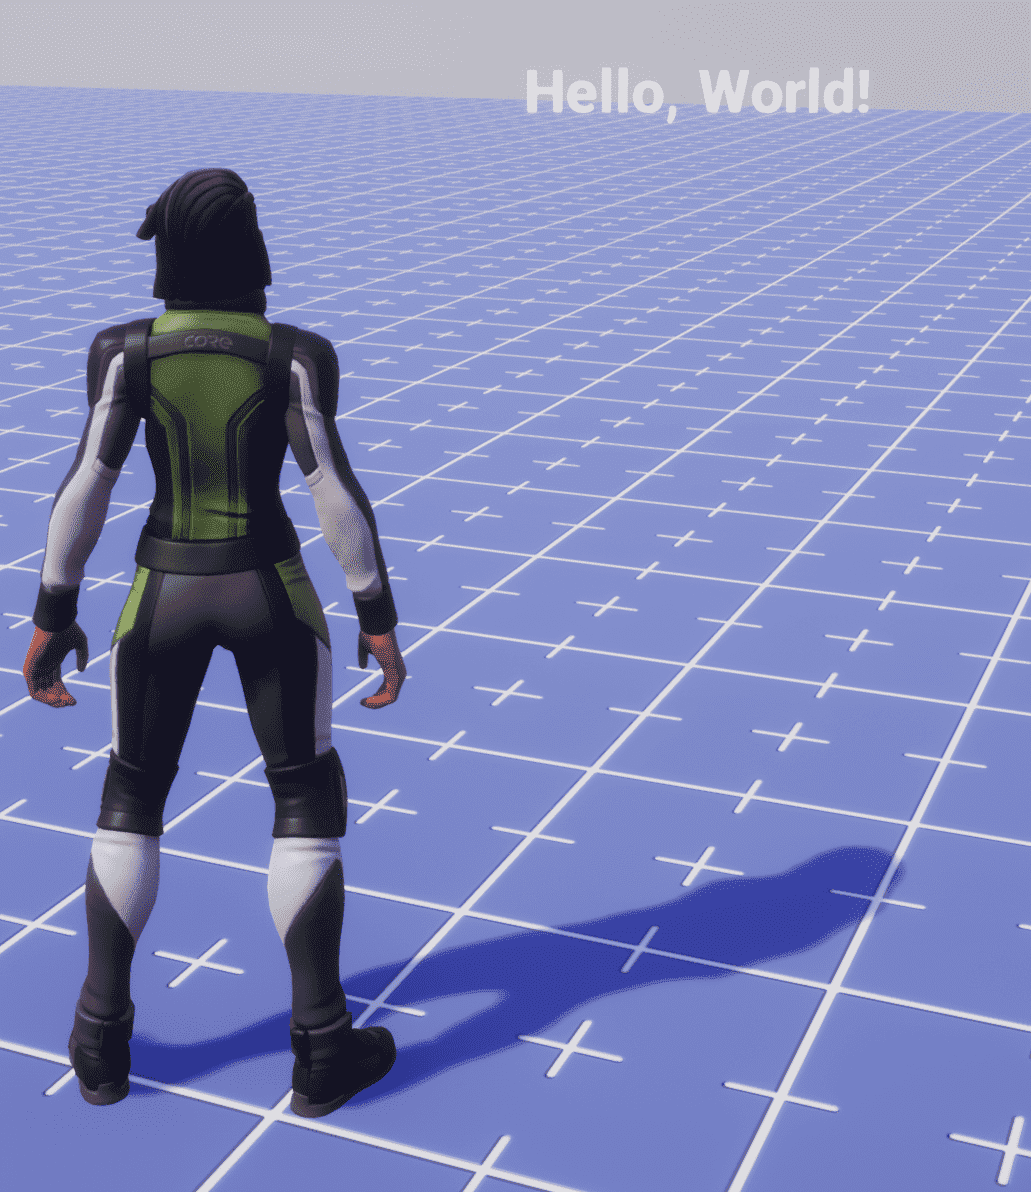
Press Play and type into chat to test the changes to the speech bubble. It should appear by your character's head and facing the correct direction.
However, the speech bubble doesn't move, and seems to stay in the world indefinitely.
Animate and Destroy the Speech Bubble
We'll start with the simplest version of the animation, and in the following step modify it to use a while loop and Lerp to move more dynamically.
To move the speech bubble up and destroy it, we'll use the MoveTo function and the Destroy function. To make sure the script waits until the moving is finished, we'll use Task.Wait, and to keep that from pausing all the other client scripts, we will also use Task.Spawn.
Add this code to the bottom of your SpawnSpeechBubble function.
Task.Spawn(function() -- Spawn a new thread, so we don't interrupt anything else
    local BUBBLE_LIFESPAN = 4 -- how long we want the speech bubble to stick around
    bubble:MoveTo(newBubblePosition + Vector3.UP*200, BUBBLE_LIFESPAN) -- move 200 higher than before
    Task.Wait(BUBBLE_LIFESPAN) -- Wait until the MoveTo is finished
    bubble:Destroy() -- Remove the speech bubble from the world
end)
Test this new change out, and you'll see your chat bubble float into the air like a balloon.
Unfortunately, the player can still walk away from the chat bubble, because it moves directly up from where it starts
Improve the animation
The MoveTo function does a great job of moving things at a constant speed for a specified amount of time without requiring creators to calculate exactly where it should be each frame. However, in order to keep the bubble over the player's head, we do need to recalculate where it should be each frame, so we're going to try a new approach with SetPosition and Vector3.Lerp.
Vector3.Lerp()takes two points, and a time value, and finds a spot between those points based on the time.
Change your Task.Spawn function to use this new strategy:
Task.Spawn(function() -- Spawn a new thread, so we don't interrupt anything else
    local BUBBLE_LIFESPAN = 4 -- how long we want the speech bubble to stick around

    local startTime = time() -- a value for *right now* in seconds
    while time() < startTime + BUBBLE_LIFESPAN do -- repeat until it's time for the bubble to go
        local timeSinceStart = time() - startTime -- how many seconds since the animation started
        local amountToMoveUp = Vector3.Lerp(Vector3.ZERO, Vector3.UP*200, timeSinceStart / BUBBLE_LIFESPAN) -- finds a value between zero and 200 up based on what % of the time has passed
        bubble:SetWorldPosition(player:GetWorldPosition() + Vector3.UP*100 + amountToMoveUp) -- put the bubble where it should be based on the calculations
        Task.Wait() -- wait exactly one frame
    end
    bubble:Destroy() -- destroy the bubble once that loop is done
end)
Test it out again, and watch the stick with the player, float up, and disappear.
Adjust the Speech Bubble Template
Everything looks beautiful now, and the final step is to update the SpeechBubbleTemplate so that the text is centered on its position. You can also use this flow to add audio and VFX to the template, to make it more obvious to players.
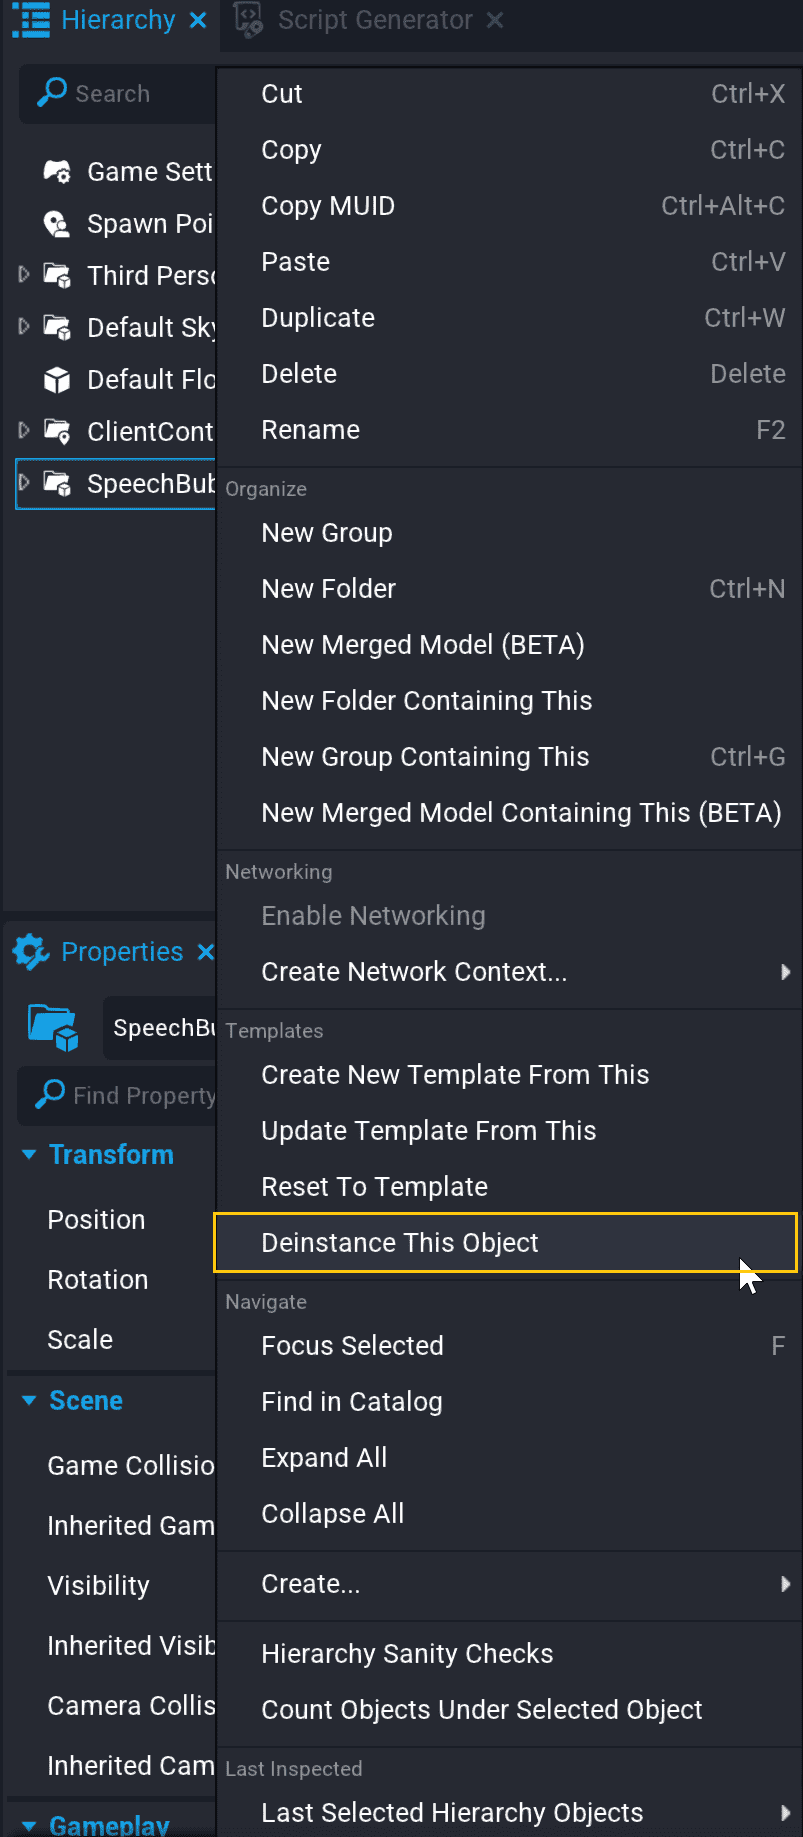
- Drag the SpeechBubbleTemplate template from Project Content into the Hierarchy.
- Right click SpeechBubbleTemplate and select Deinstance This Object.
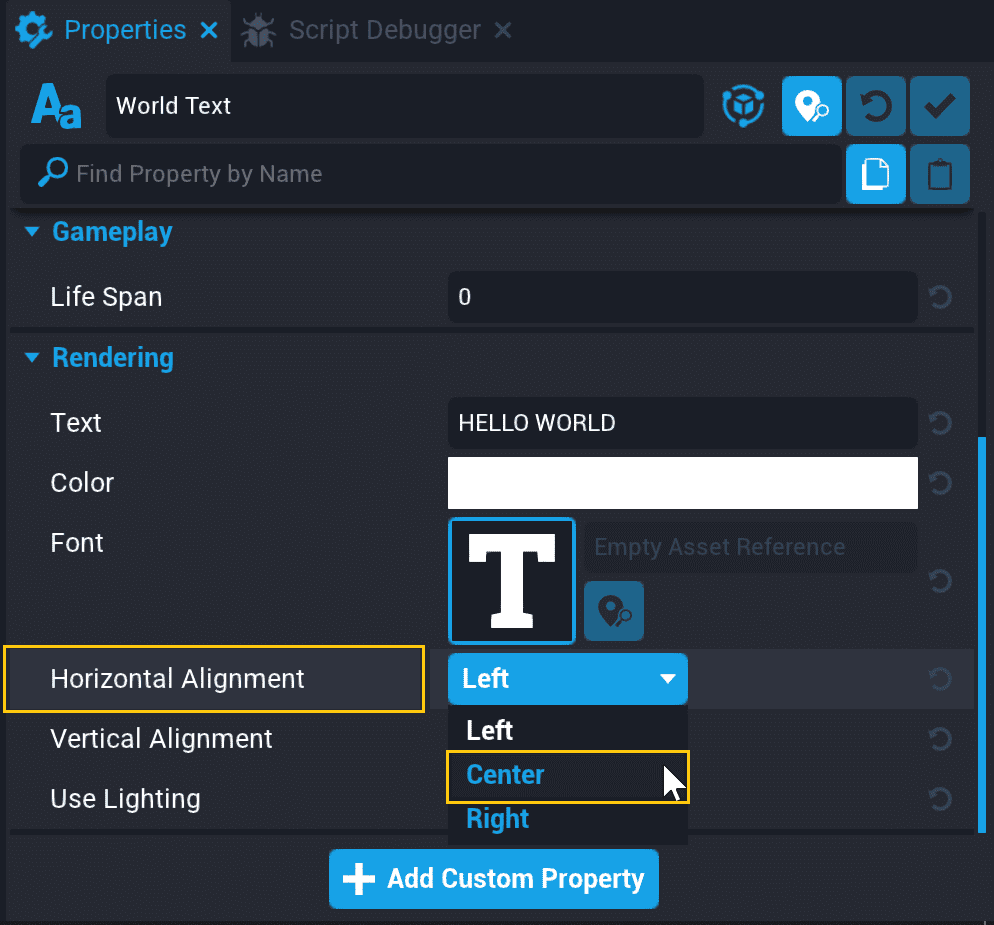
- Select the World Text inside of SpeechBubbleTemplate and open the Properties window.
- Find the Horizontal Align property and change it to Center.
- Right-click SpeechBubbleTemplate and select Update Template From This.
You can add audio and visual effects to this client context folder as well to see how they call out the speech bubble.
Complete Code
local propSpeechBubbleTemplate = script:GetCustomProperty("SpeechBubbleTemplate")

function SpawnSpeechBubble(player, data)
    -- spawn the text bubble
    local bubble = World.SpawnAsset(propSpeechBubbleTemplate)
    -- find the World Text from the custom property on the template
    local propWorldText = bubble:GetCustomProperty("WorldText"):WaitForObject()
    -- change the text to the message from chat
    propWorldText.text = data.message

    local newBubblePosition = player:GetWorldPosition() + Vector3.UP * 100 -- 100 up from wherever the player is

    bubble:SetWorldPosition(newBubblePosition)
    bubble:LookAtLocalView() -- magical function to make things face the screen!

    Task.Spawn(function() -- Spawn a new thread, so we don't interrupt anything else
        local BUBBLE_LIFESPAN = 4 -- how long we want the speech bubble to stick around

        local startTime = time() -- a value for *right now* in seconds
        while time() < startTime + BUBBLE_LIFESPAN do -- repeat until it's time for the bubble to go
            local timeSinceStart = time() - startTime -- how many seconds since the animation started
            local amountToMoveUp = Vector3.Lerp(Vector3.ZERO, Vector3.UP*200, timeSinceStart / BUBBLE_LIFESPAN) -- finds a value between zero and 200 up based on what % of the time has passed
            bubble:SetWorldPosition(player:GetWorldPosition() + Vector3.UP*100 + amountToMoveUp) -- put the bubble where it should be based on the calculations
            Task.Wait() -- wait exactly one frame
        end
        bubble:Destroy() -- destroy the bubble once that loop is done
    end)


end

Chat.receiveMessageHook:Connect(SpawnSpeechBubble)
Learn More
Chat in the Core Lua API | Vector3 in the Core Lua API