Camera Captures
Overview
In this tutorial you will learn how to create camera captures that can be displayed in the UI for your game. Camera capturing allows you to take a picture of the screen viewed through a camera. This could be the full screen, or a camera that is zoomed in on one specific object that could be used as an item in the UI, for example, an inventory item.
- Completion Time: 15 minutes.
- Knowledge Level: None needed.
- Skills you will learn:
- Learn about the Camera properties that need to be changed for creating camera captures.
- Creating UI components to display the camera capture.
- Capturing images and displaying them in the UI from a Lua script.
- Understanding memory budget.
- Releasing camera captures.
- Refreshing camera captures.
Create UI
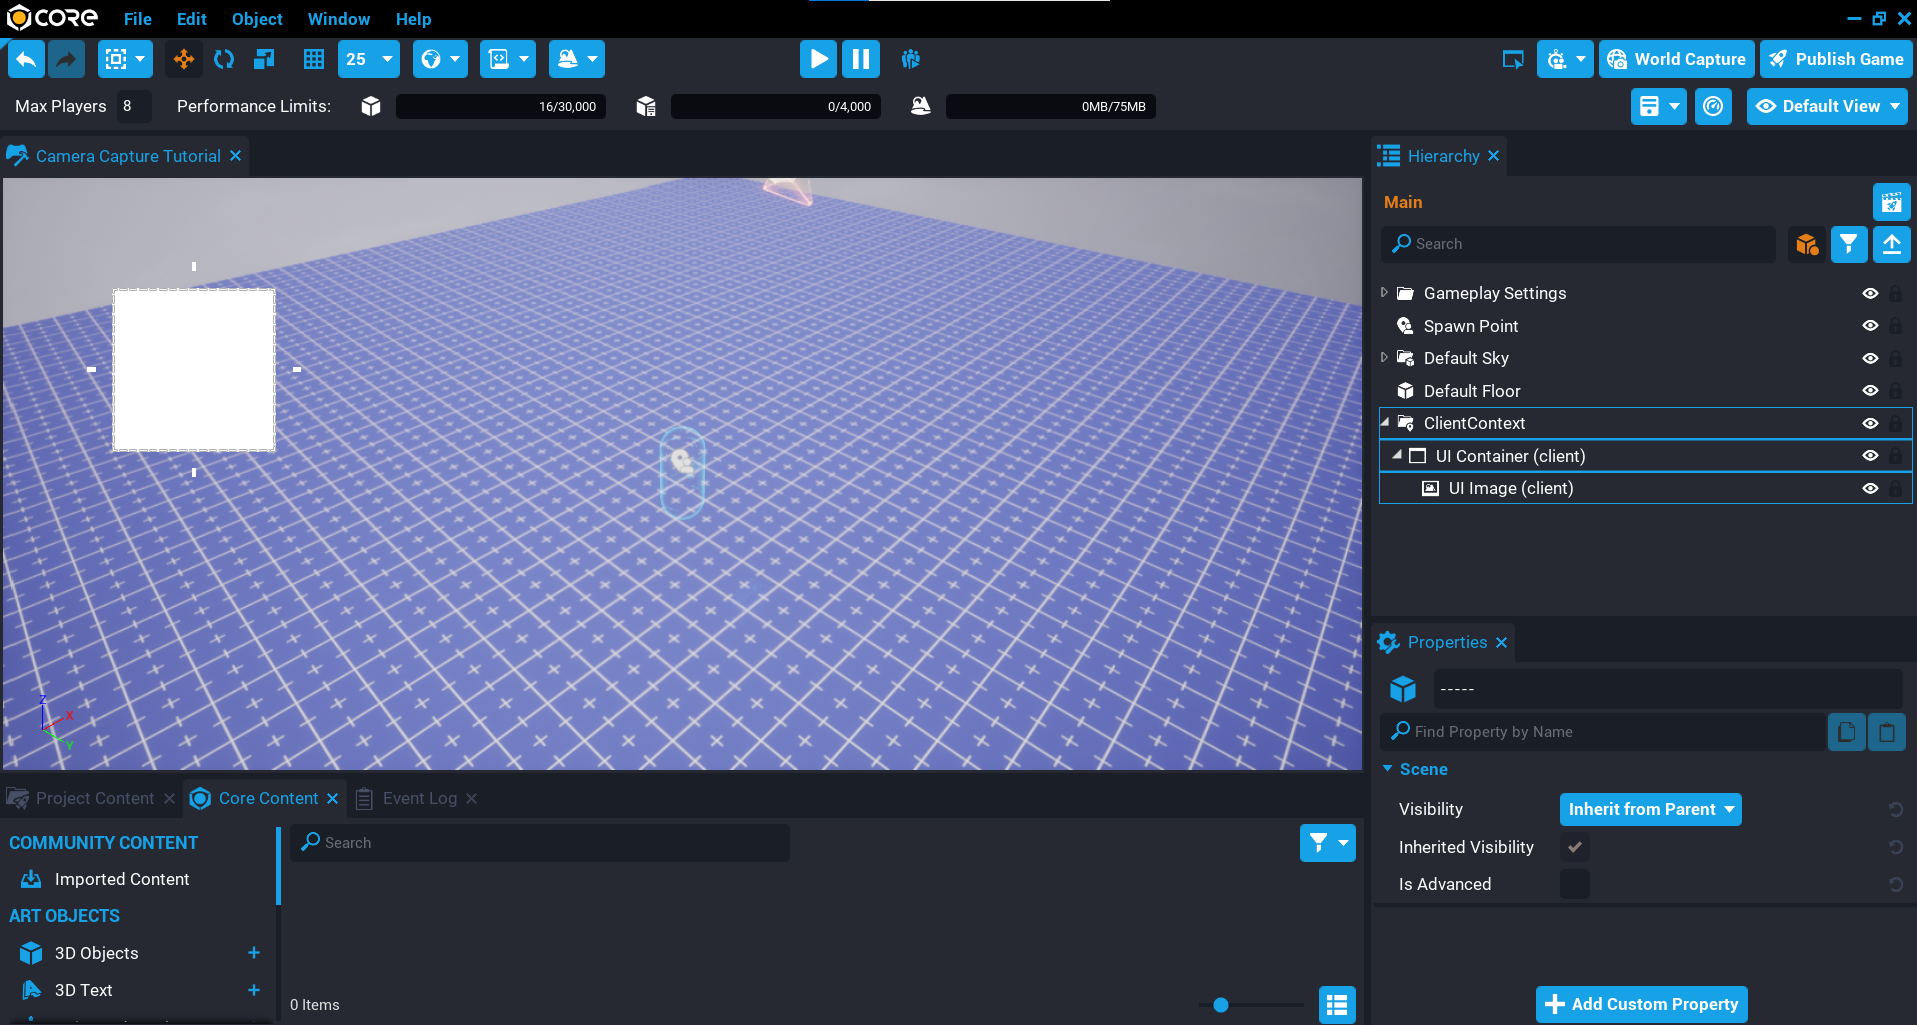
To view a camera capture, you will create a few UI components. A UI Image will be used to display the camera capture on the screen.
- Create a Client Context in the Hierarchy window.
- Create a UI Container inside the Client Context folder.
- Create a UI Image inside the UI Container. You can move the image around, and change the size.
Create Camera
You can create Camera Captures from any Camera, but it is recommended to setup a dedicated camera for doing the capturing. By having a dedicated camera, you can position it, rotate it, and change various Camera properties to get the exact look you want.
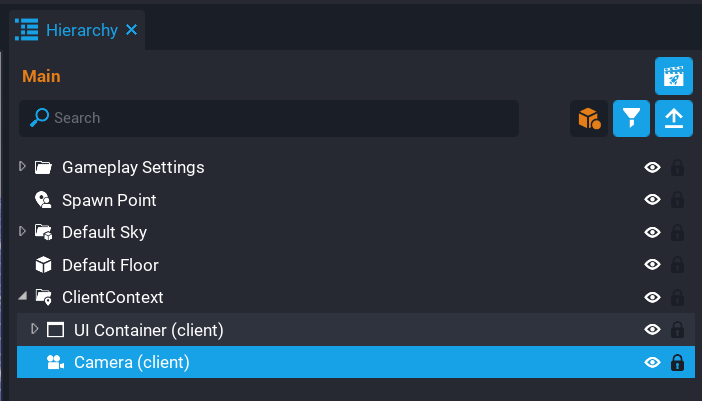
Create a new Camera inside the Client Context folder.
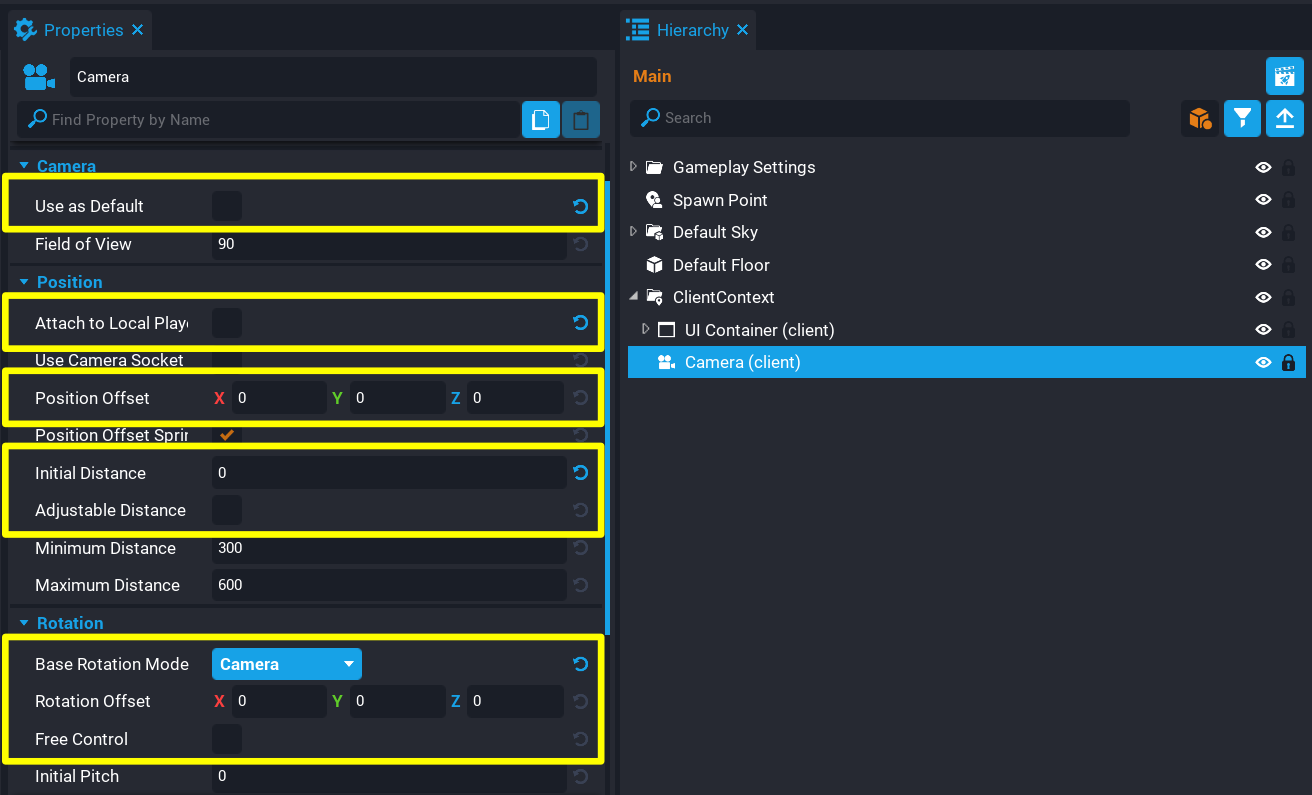
Change Camera Properties
When using a camera for creating camera captures, some properties need to be changed. Core will warn you in the Event Log about which properties should be changed when you try to create a capture.
Modify the following properties on the Camera you created.
| Property | Property Value |
|---|---|
| Use as Default | This is optional, but for the tutorial it needs to be unchecked. |
| Attach To Local Player | Should be left unchecked. |
| Position Offset | Should be set to Zero. |
| Initial Distance | Should be set to Zero. |
| Adjustable Distance | Should be left unchecked. |
| Base Rotation Mode | Should be set to Camera. |
| Rotation Offset | Should be set to Zero. |
| Free Control | Should be left unchecked. |
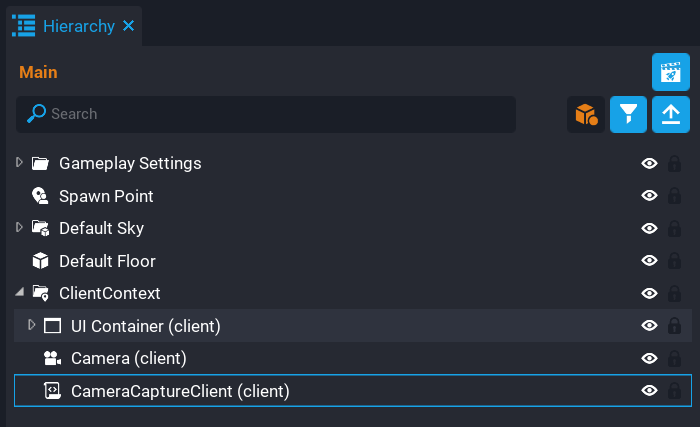
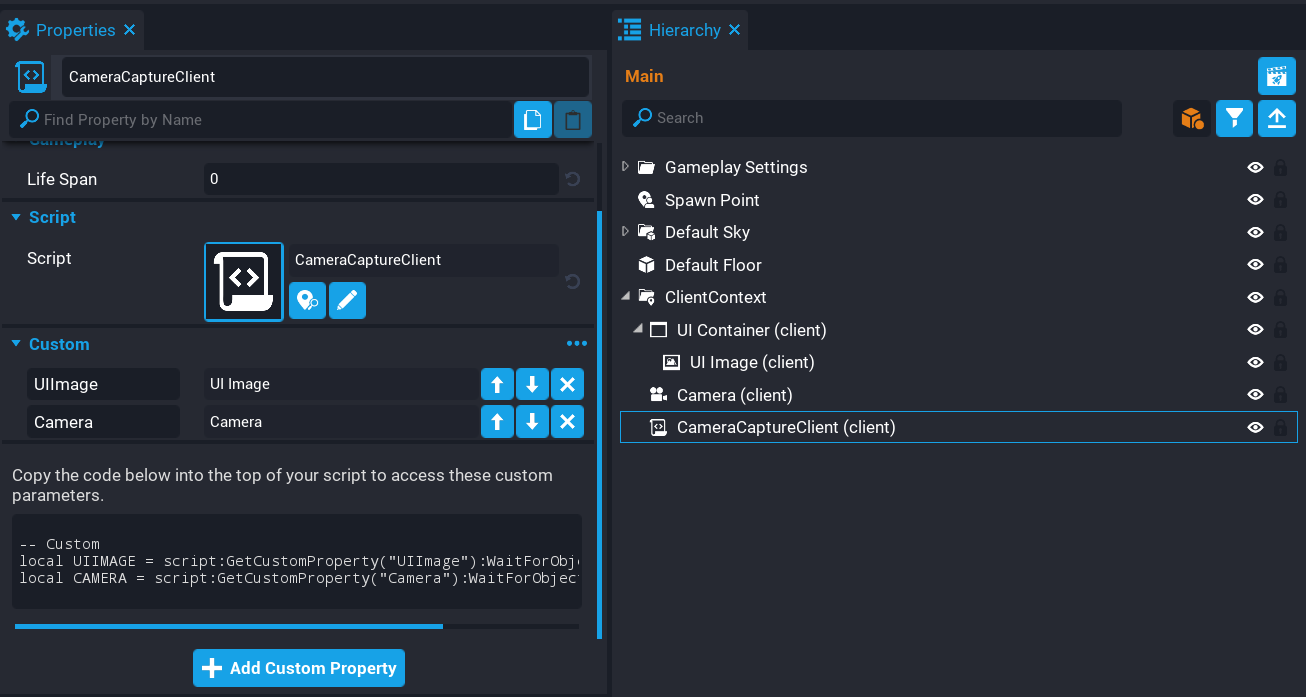
Create CameraCaptureClient Script
To be able to create camera captures, a script will be required that will use the Capture function to create a capture and return it so you can use it.
Create a new script called CameraCaptureClient and place it inside the Client Context folder in the Hierarchy.
Create Custom Properties
The CameraCaptureScript needs a reference to the UI Image and the Camera you created earlier.
- Add the UI Image in the Hierarchy to the CameraCaptureScript as a Custom Property.
- Add the Camera in the Hierarchy to the CameraCaptureScript as a Custom Property.
Create Property References
Open up the CameraCaptureScript and create references to the UI Image and Camera. The reason you need both of these is because you will use the CAMERA to create the camera capture, and the UIMAGE to display the camera capture in the UI.
local UIIMAGE = script:GetCustomProperty("UIImage"):WaitForObject()
local CAMERA = script:GetCustomProperty("Camera"):WaitForObject()
Create Camera Capture
To create a camera capture, you can call the Capture function and pass the resolution size as the first argument. You can create any combination of camera captures, but there is a memory budget which is explained in a later section. If you do reach the limit, further attempts to create camera capture instances will fail. You should then consider reusing or releasing existing captures.
The camera capture is stored in the capture variable and passed into the SetCameraCapture function. The UIImage will be set to the camera capture that will show in the UI. It is good practice to make sure the capture exists to prevent errors, which can be done by using an if statement.
local capture = CAMERA:Capture(CameraCaptureResolution.LARGE)

if capture then
    UIIMAGE:SetCameraCapture(capture)
end
The CameraCaptureClient Script
CameraCaptureClient
local UIIMAGE = script:GetCustomProperty("UIImage"):WaitForObject()
local CAMERA = script:GetCustomProperty("Camera"):WaitForObject()

local capture = CAMERA:Capture(CameraCaptureResolution.LARGE)

if capture then
    UIIMAGE:SetCameraCapture(capture)
end
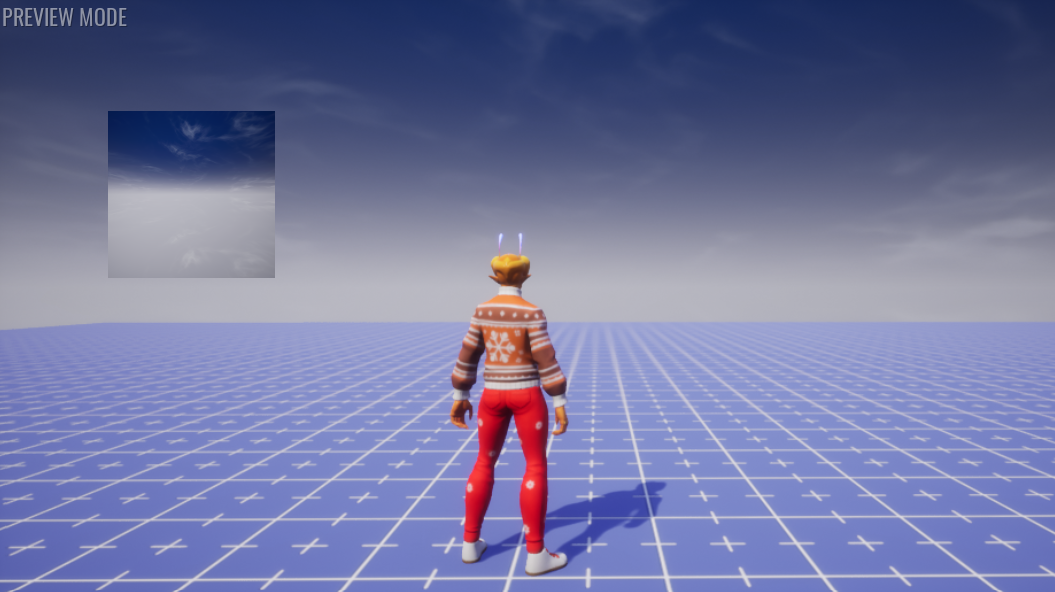
Test the Game
Test the game and see if the UI image displays the camera capture. The captured image isn't very interesting at the moment.
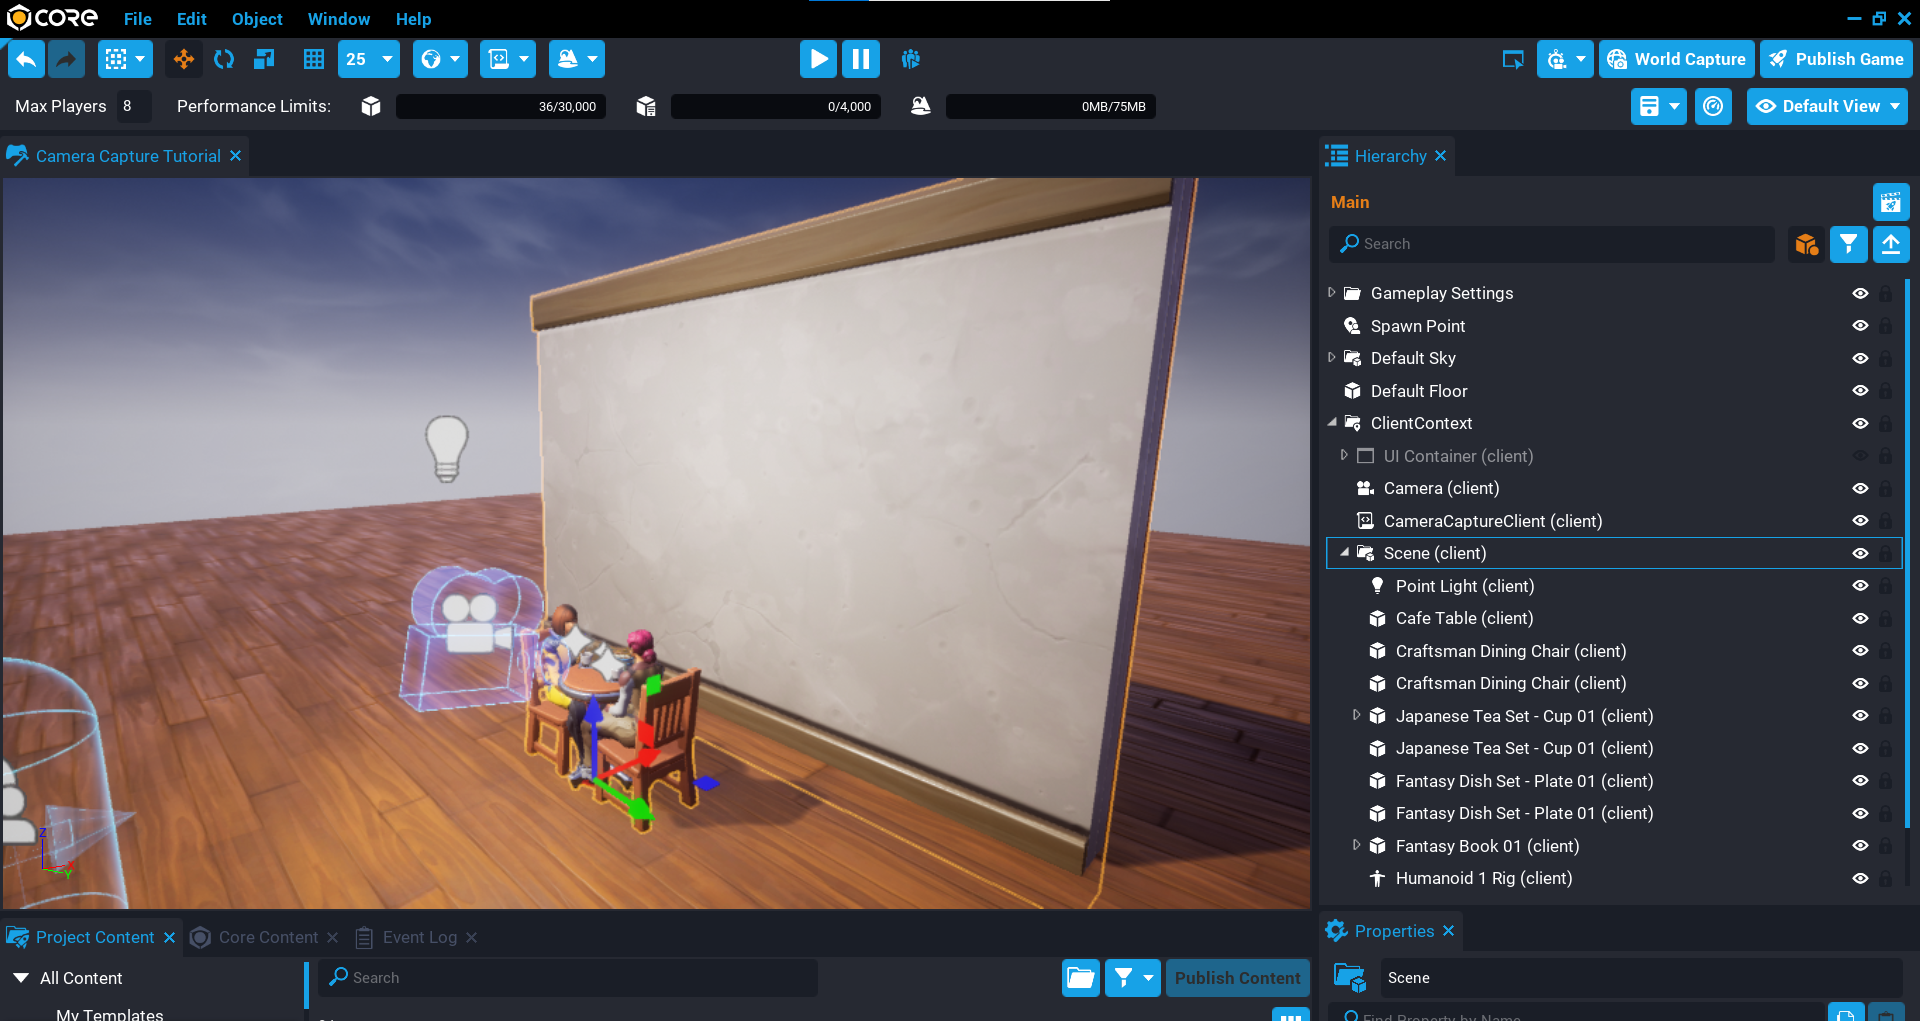
Create a Scene to Capture
Create a scene by adding objects from Core Content that will be used in the camera capture. Make sure to position the camera so it looks at the scene. Getting the camera in the right position can be trial and error, so play the game often to see what is being captured until you have the camera pointing where you want.
Even with a few objects it is easy to create interesting scenes. The scene in the image below was built using these objects:
-
3D Objects
- Japanese Temple Wall 01.
- Cafe Table.
- Craftsman Dining Chair.
- Japanese Tea Set - Cup 01.
- Fantasy Dish Set - Plate 01.
- Fantasy Book 01, Fantasy Book 02, and Fantasy Book 03.
-
Animated Meshes
- Humanoid 1 Rig (customised).
-
Effects / Lighting
- Steam Volume VFX (for cups).
- Point Light
-
UI
- Fantasy Frame 007.
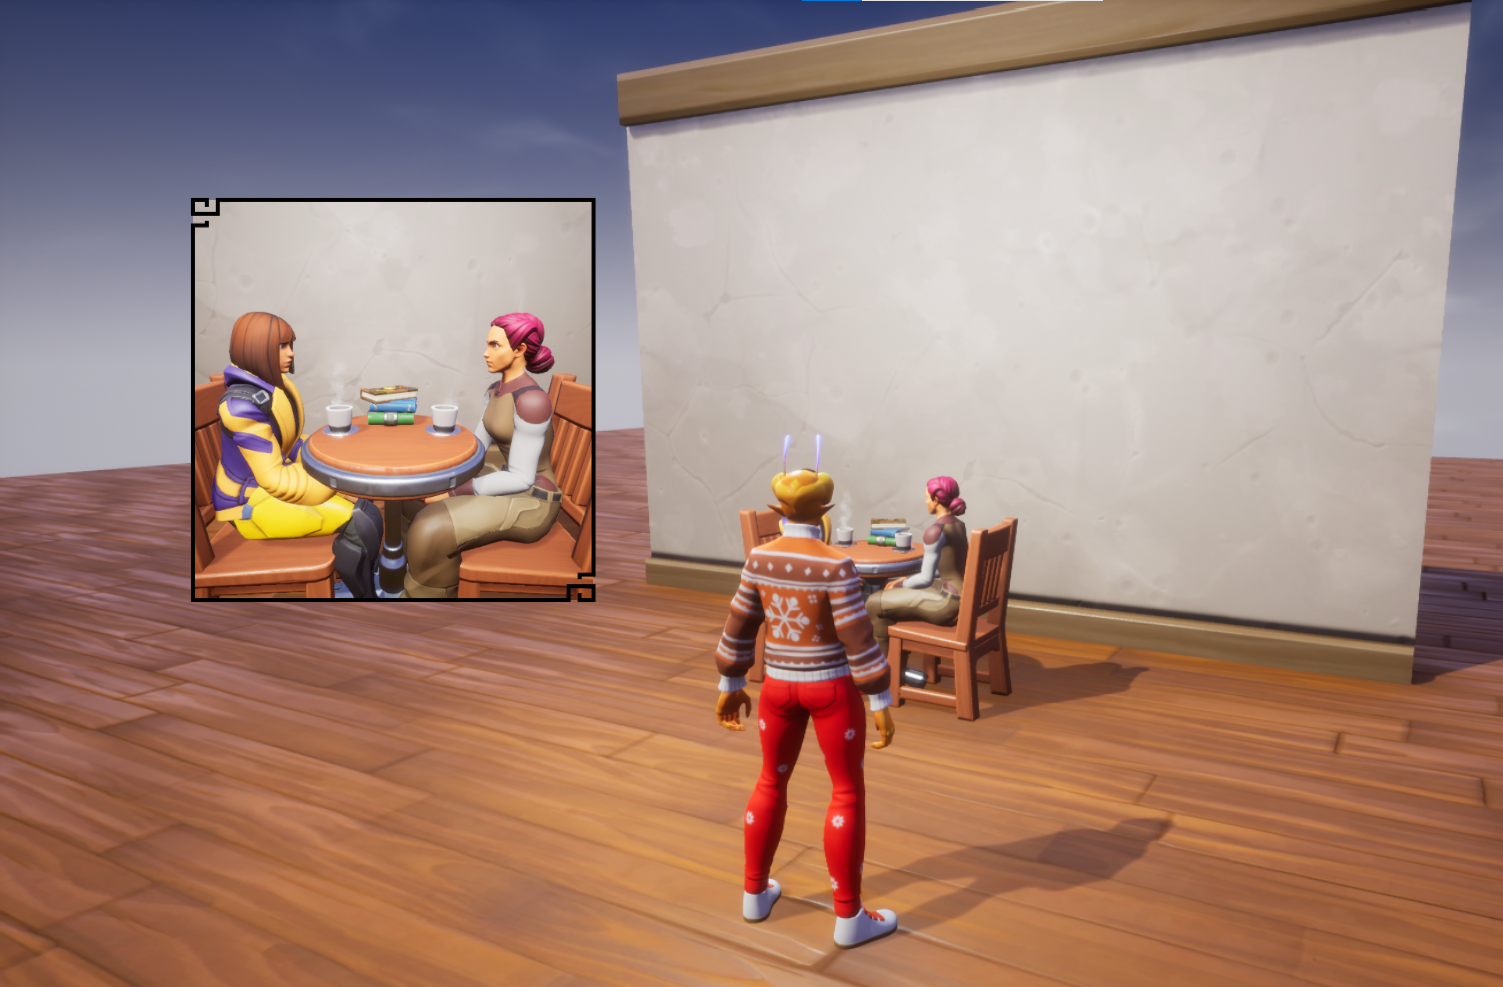
Test the Game
Test the game to see your scene captured and displayed in the UI.
Memory Budget
Each camera capture instance uses a certain amount of the memory based on the resolution size. You are free to create whatever combination (mixed resolutions) of camera captures you need up until the budget is fully consumed.
The total budget is 8 megapixels (8,388,608 pixels). For example:
You could create 2048 captures at the very small resolution.
- 64 x 64 = 4,096
- 8,388,608 / 4,096 = 2048
If you are creating a lot of camera captures at different resolutions, you may want to keep track of how much memory budget you have left before you need to start reusing or releasing existing captures. For the most part, you will not need to worry about doing this unless you are needing a lot of camera captures.
| Resolution Size | Pixel Size | Total Pixels | Maximum Instances |
|---|---|---|---|
| Very Small | 64 x 64 | 4,096 | 2048 |
| Small | 128 x 128 | 16,384 | 512 |
| Medium | 256 x 256 | 65,536 | 128 |
| Large | 512 x 512 | 262,144 | 32 |
| Very Large | 1024 x 1024 | 1,048,576 | 8 |
Releasing Camera Captures
The Capture function may return nil if the memory budget limit has been reached. To solve this issue, you can release captures. Captures that have been released will be invalid and should no longer be used.
Consider a game that has an inventory system. Using camera capturing, you can display all the inventory icons in the UI by capturing the 3D representation of them. If you hit the memory budget limit, then the rest of the items will not get displayed. This could be because your inventory has a lot of filled slots, so the total memory budget is reached. You could solve this in a few different ways:
- Create paged inventory, making sure the memory budget doesn't hit the limit per page. Each page would reuse or release captures.
- Reduce the resolution size that will allow for more camera captures. For example, 2048 captures can be done at the smallest resolution.
To release a capture image, you will need to store a reference to the captured image when creating the capture.
In the example code below, a function will check if the capture is valid before creating a new capture. If it is a valid capture, then it can be released using the Release function. By doing this, the image in the UI will revert to its default state. To see this working, the code below will create a capture, wait 1 second, then clear the capture by passing in true to the CreateCapture function.
local CAMERA = script:GetCustomProperty("Camera"):WaitForObject()
local UI_IMAGE = script:GetCustomProperty("Image"):WaitForObject()

local capture = nil

local function CreateCapture(clear)
    if capture and capture:IsValid() then
        capture:Release()
    end

    if not clear then
        capture = CAMERA:Capture(CameraCaptureResolution.VERY_LARGE)

        UI_IMAGE:SetCameraCapture(capture)
    end
end

CreateCapture()

Task.Wait(1)

CreateCapture(true)
In the video below, the capture image will be displayed, and then released after 1 second. Notice how the captured image is cleared.
Refreshing Camera Captures
Camera captures can be refreshed. This can be useful if the 3D object being used in the capture has changed, or to create things such as mirrors (that is rear view mirror in a car), or surveillance cameras.
In the example code below, the CreateCapture function is called from within the Tick function. Every .1 second, the CreateCapture function will be called again. This function will check if the capture variable is a valid capture instance, and if so, Refresh it. By doing this, the UI image becomes an animation.
local CAMERA = script:GetCustomProperty("Camera"):WaitForObject()
local UI_IMAGE = script:GetCustomProperty("Image"):WaitForObject()

local capture = nil

local function CreateCapture()
    if capture and capture:IsValid() then
        capture:Refresh()
    else
        capture = CAMERA:Capture(CameraCaptureResolution.VERY_LARGE)
        UI_IMAGE:SetCameraCapture(capture)
    end
end

function Tick()
    CreateCapture()
    Task.Wait(.1)
end
Notice in the video how the image is changing. The Bottle is getting zoomed in.
Summary
You can do some interesting things with camera captures. For example, creating pictures by adding some objects to the scene and moving the capture camera around. Mirrors on a vehicle, and many more ideas. Try it yourself.
Learn More
Camera Capture API | Camera Capture Resolutions | Camera API | UI Reference | Cosmetic Tutorial