Capture The Flag In Core
Capture The Flag Overview
The Capture The Flag framework contains two different game variations placed in separate scenes. The first is 1 Flag where the two teams must try to capture a single neutral flag and bring it back to their home base safely. The second is 2 Flag where each base has a flag and teams focus on stealing the flag from the opposing team's base.
Creating a Framework Game
To get started, use the CREATE menu to make a new project.
Open the NEW PROJECT Menu

- With Core open, click the CREATE tab in the top menu bar.
- Click the NEW PROJECT tab at the top of the CREATE menu.
Select the Capture the Flag Framework
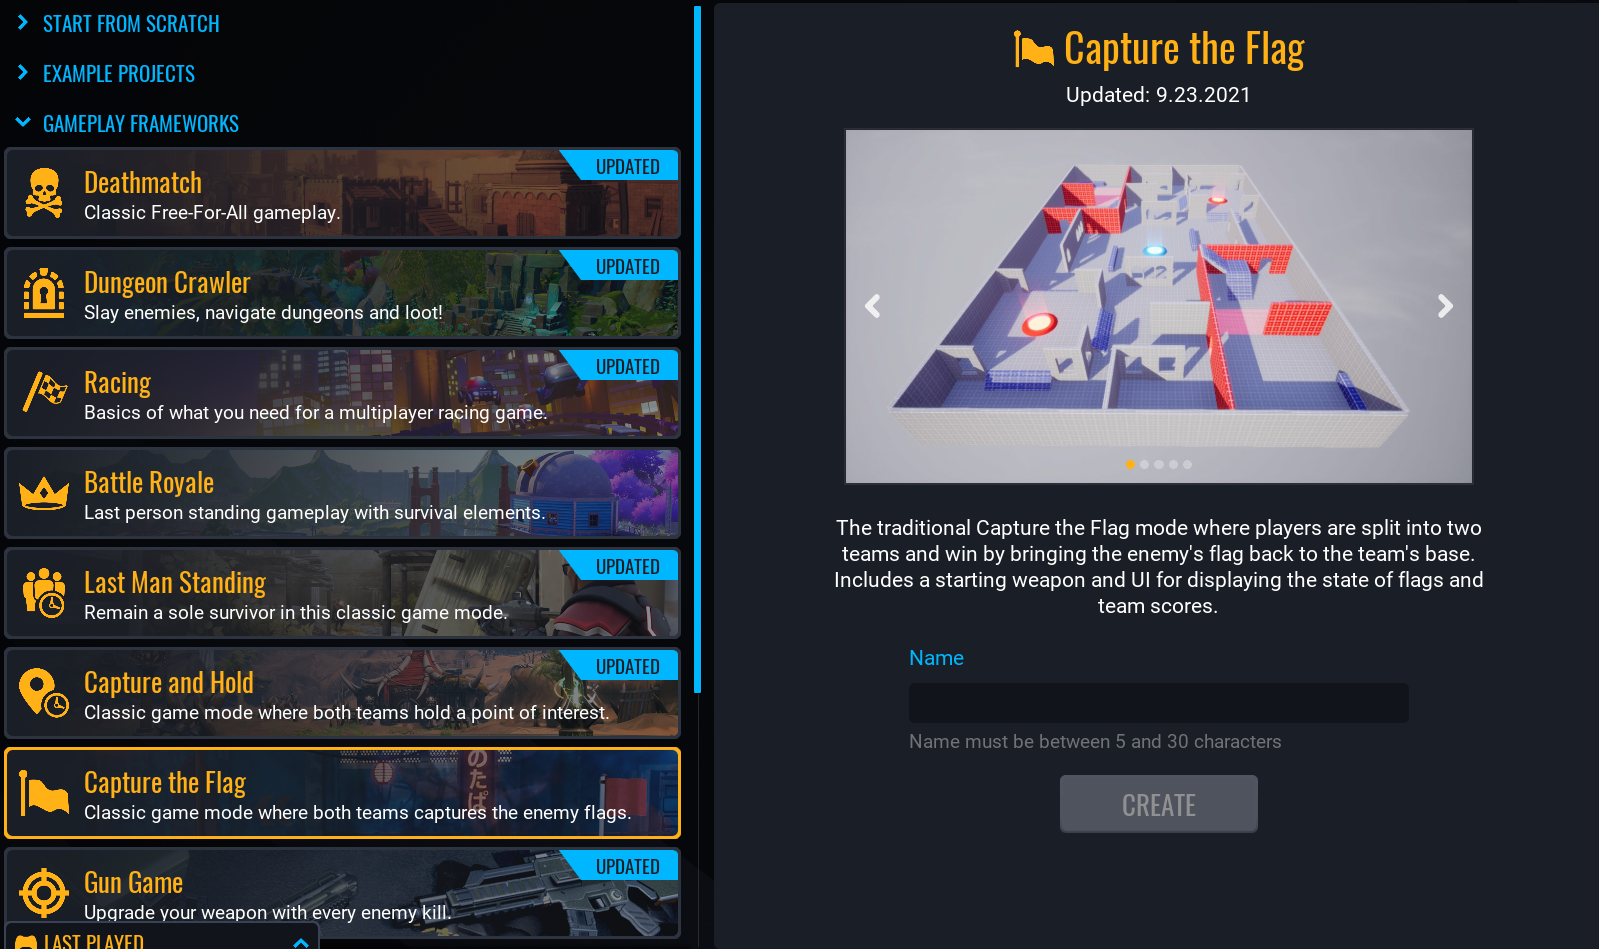
- In the GAMEPLAY FRAMEWORKS section, select Capture the Flag.
- In the right side panel, name your project.
- Click CREATE.
Switching Between Scenes
The framework has two different game modes that are in different scenes. Testing both modes requires knowing how to switch scenes in Core.
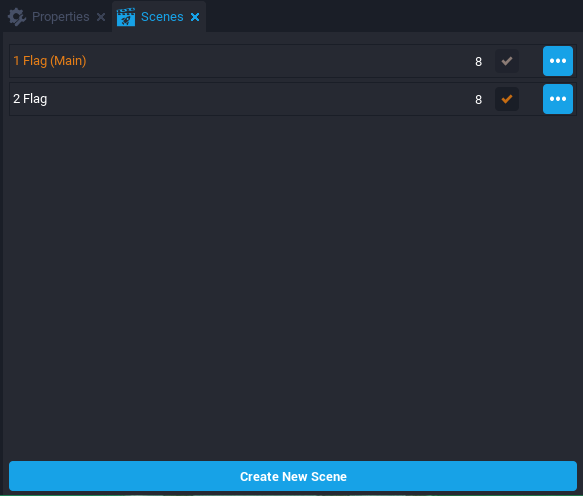
Open the Scenes Window
The Scenes window displays all the available scenes in the project. You can open the Scenes window by clicking Window > Scenes in the top menu bar. The current scene displayed is highlighted orange, which should be 1 Flag.
Note
The 1 Flag scene is also marked as the Main scene. The main scene for a published project is the scene that will be loaded for players by default when entering your game.
Test 1 Flag Scene
The game will not start until there are at least two players so Multiplayer Preview Mode must be enabled to test the game.

- Click
 to switch the Preview Mode to Multiplayer.
 - Select the 2 Players option.
- Press
 to start the preview. This will open a separate game window for each player.
 - On one of the game windows, grab the neutral flag in the center of the map and bring it back to capture zone for your team. The score should increase by one and reset the flag to the neutral zone.
Load the Second Scene
Reopen the Scenes window and click on the 2 Flag scene. A prompt will display asking if you would like to continue loading a new scene. Click the Load button to continue.
Test 2 Flag Scene
With the 2 Flag scene displayed, press play to start the preview. The neutral center flag is no longer present and players must travel to the enemy's capture zone to acquire their flag. Also both flags are available to be captured at the same time.
Switch back to 1 Flag Scene
Now that both scenes have been explored, this tutorial will move forward using the 1 Flag scene. Inside the Scenes window, select the 1 Flag scene and click the Load button.
You can find more information about Scenes in the Scenes Reference
Change the Starting Weapon
The default starting weapon is basic rifle that does not allow the player the aim. This weapon can be easily changed using template objects from Core Content.
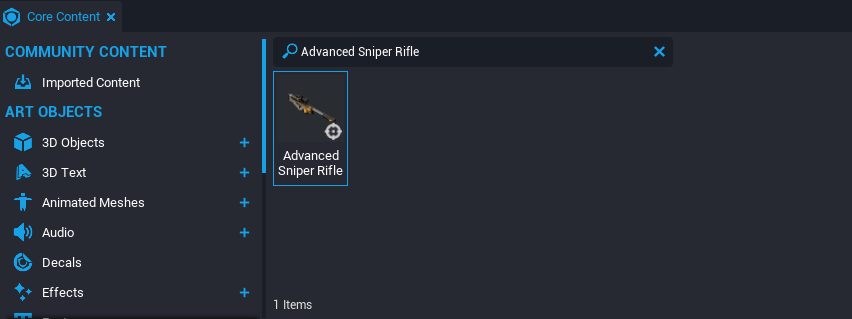
Find a New Weapon
Inside the Core Content window, search the keyword Advanced Sniper Rifle to find a template of a long range weapon. Drag the Advanced Sniper Rifle template into the Hierarchy window.
Create a New Weapon Template
The Advanced Sniper Rifle template has children scripts and a trigger box for picking up the weapon from the ground. Since the player will spawn with the weapon in their hands, there will be no need for this functionality.
- Right click the Advanced Sniper Rifle (networked) object in the Hierarchy and select Deinstance This Object.
- Select the Pickup Trigger (networked) child and press Del to delete it.
- Delete the EquipmentPickupServer (server) script from within the Server Context (networked) folder.
- Delete the EquipmentPickupClient (client) script from within the Client Context (networked) folder.
- Right click the Advanced Sniper Rifle (networked) object and select Create New Template From This.
- Name the template
Sniper Rifleand then create the new template. - Delete Sniper Rifle (networked) object from the Hierarchy.

Replace the Starting Weapon
You can now use the Sniper Rifle template to replace the starting weapon.
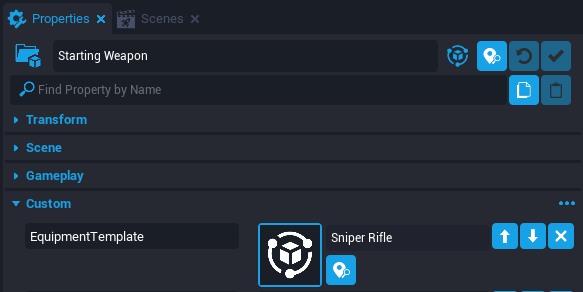
- Inside the Hierarchy, select the Gameplay Settings > Starting Weapon group.
- Open the Properties window and scroll down to the Custom section to see the custom properties.
- Open the Project Content window and find the Sniper Rifle template within My Templates.
- Drag and drop the Sniper Rifle template into the EquipmentTemplate custom property.
Test the New Weapon
Play the game and test out the new weapon. You should be able to aim using the right mouse button.
Modify Player Movement
The Gameplay Settings folder contains more than just the starting weapon template. It also controls the player movement settings, such as player speed and max jumps.
Open Player Settings
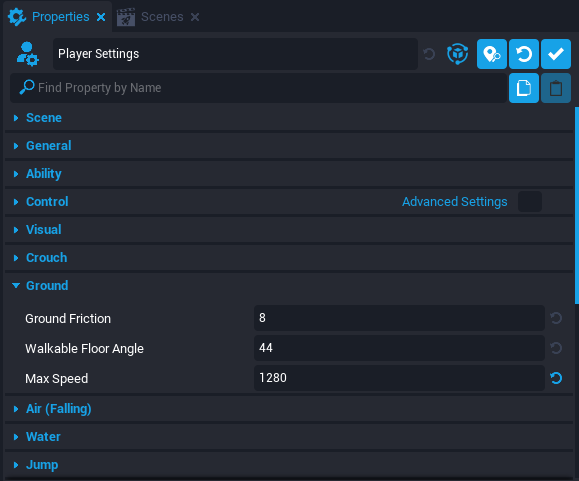
Inside the Hierarchy, expand the Gameplay Settings folder and then expand the Third Person Camera Settings group. Click on Player Settings and then open the Properties window.

Speed up the Player
The Properties window for Player Settings will have multiple sections for each type of setting. Within the Ground section, change the Max Speed property to 1280. Test the game to see if the player moves twice as fast.
Explore Player Settings
You can continue exploring the other sections of the Property window to see all player settings. One example is changing the Jump Max Count to 2 which enables double jumping.
Increase the Score Limit
The score is capped at 3 currently but it can be changed. It will require changing the game rules and updating the UI.
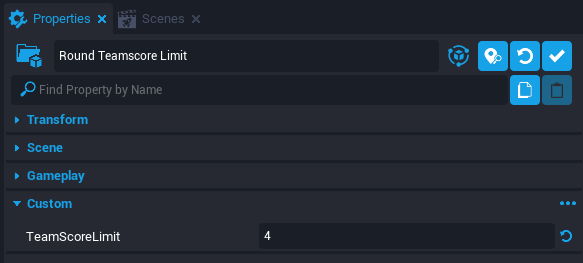
Change the Limit
Inside the Hierarchy, expand the Gameplay Setting > Game State Settings folder. Select the Round Teamscore Limit group and change the TeamScoreLimit custom property to 4.
Note
Inside the Game State Settings folder, the Lobby Required Players group can be used to test the game quicker by changing the RequiredPlayers and Countdown Time custom properties to 1. Just make sure to change it back before publishing the game.
Update the UI
The game should now end when the score is 4; however, the UI is still displaying a max score of 3. The next steps will be changing custom properties in the UI Settings folder.
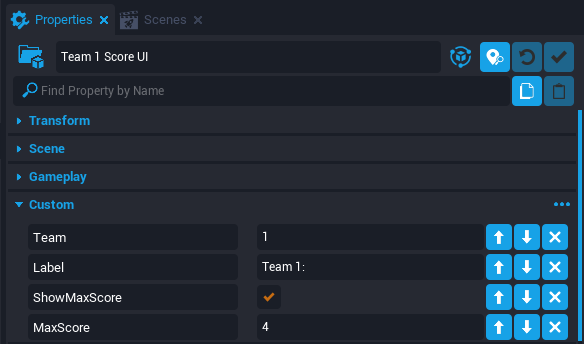
- Inside the Hierarchy, expand the UI Settings > Score UI folder.
- Click on the Team 1 Score UI group and open the Properties window.
- Change the MaxScore custom property to
4. - Click on the Team 2 Score UI group and also change the MaxScore custom property to
4.
Testing the Game
Play the game and check if the score does indeed cap at 4 before ending.
Creating a Damageable Door
An easy thing to add to any game and make it instantly cooler are Damageable Objects. Some examples are an exploding barrel, bursting box, or breakable door that can be destroyed with the player's weapon.
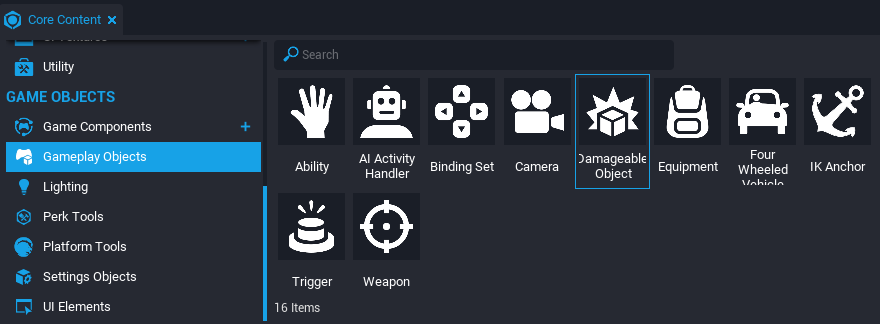
Adding a Damageable Object
Navigate to the Core Content window and scroll down to the Game Objects section. There you will find the Gameplay Objects category. Drag and drop a Damageable Object template into the Hierarchy.
Adding an Interactive Door
Core has a prebuilt door template that can be opened from both sides.
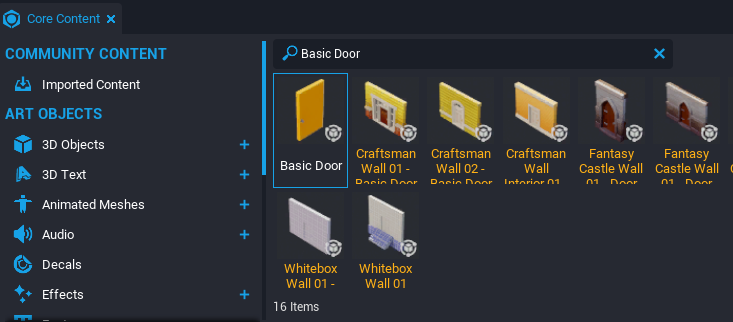
- Search for
Basic Doorin the Core Content window. - Drag and drop the Basic Door template into the Hierarchy.
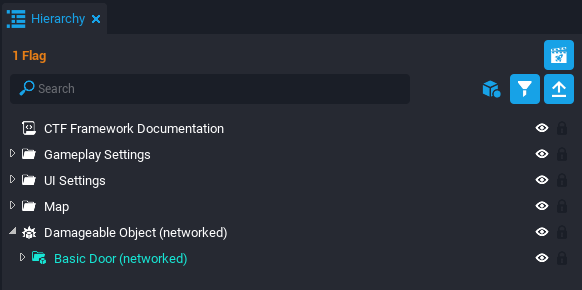
Combining the Damageable Object and Door
- Inside the Hierarchy, right click on the Basic Door group and select Deinstance This Object.
- Drag and drop the Basic Door group into the Damageable Object.
- Select the Make Children Networked option when a prompt appears.
Customizing the Door
The door will need to be transformed in order to be properly inside of a doorway.
- Select the Damageable Object in the Hierarchy.
- Use W to enable Translation mode and move the door to the doorway.
- Use E to enable Rotation mode and rotate the door if needed.
- Navigate to the Damageable Object > Basic Door > Rotation Root > Geo_StaticContext folder.
- Select the Whitebox Door 01 object inside of the folder.
- Use R to enable Scale Mode and make door big enough to fit in the doorway.

Adding a Damage Effect
Currently, the door will disappear after being destroyed but it looks like it just vanishes. An effect can be added to make it more realistic.
- In Core Content, search for
Damageable Crate. - Drag and drop the template into the Hierarchy.
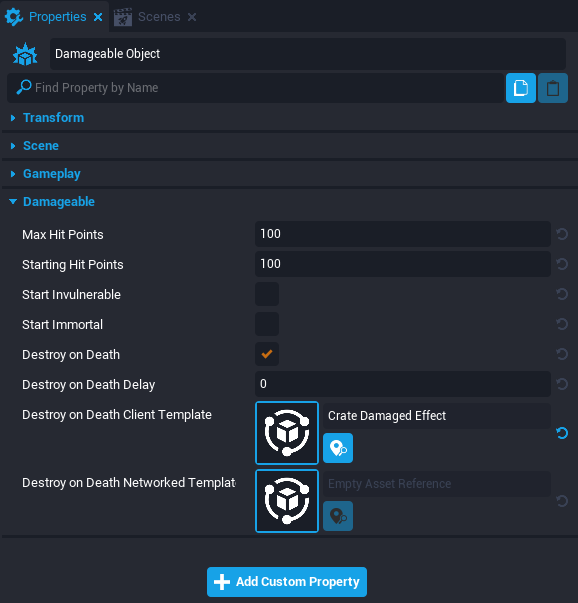
- Select the Damageable Crate and open the Properties window.
- Click the Find in Asset Catalog button
 next to the Destroy on Death Client Template property. The Project Content window should open with the Crate Damaged Effect template highlighted.
 - Select the Damageable Object in the Hierarchy and open the Properties window.
- Drag and drop the Crate Damaged Effect template into the Destroy on Death Client Template property.
- Delete the Damageable Crate from the Hierarchy.
Test the Damageable Door
Play the game and find the door object. Get close to the door and try to open it. Then try shooting it to see the damage effect.
Create a New Template
Right click the Damageable Object in the Hierarchy and select Create New Template From This. Rename it as Damageable Door. Now more doors can be added by dragging them from the Project Content window.

Learn More
Publishing Your Game | Scenes | Damageable Objects | Weapons Tutorial