Portals
The design of Core allows for fast travel between any Core game, allowing players to jump through the Metaverse. Portals allow players to connect interconnected games, as well as build hubs for their own game portfolios, or to build a social space that connects to the Core Game queues, like Active and Featured.
Creating Portals to Other Games
Add a Portal to the Game
The Game Portal template can be added to any game to build a portal to another one.
- Search for the Game Portal template in Core Content
- Click and drag the Game Portal template to the project.
- With the Game Portal selected, open the Properties window.
- Add the Game's ID to the Game ID property.
Find a GameID
Core Game ID's can be found in the URL of the Core Game page.
- Find the game's page on CoreGames.com through search and copy its URL.
- To get the URL directly from the Core Client, open the game page, and copy the URL via the Share button.
- Delete
https://www.coregames.com/games/from the URL to leave only the Game ID.
Info
Game ID's are a 6-character string, plus the hyphenated name of the game like b983bc/core-plaza.
Get Info for a Game
With a Game ID, you get more information about a game through a CoreGameInfo object, like the name of the game, or the creator. See the CorePlatform namespace in the Core Lua API Reference for more information.
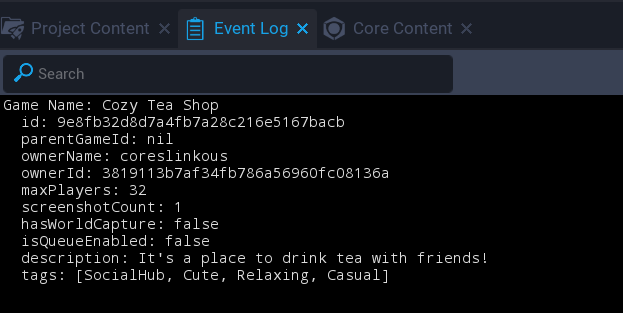
In the example below, all the information received by GetGameInfo is printed out to the Event Log.
local gameId = "9e8fb3/cozy-tea-shop"
local gameInfo = CorePlatform.GetGameInfo(gameId)

print("Game Name: " ..gameInfo.name)
print("  id: "..gameInfo.id)
print("  parentGameId: "..tostring(gameInfo.parentGameId))
print("  ownerName: "..gameInfo.ownerName)
print("  ownerId: "..gameInfo.ownerId)
print("  maxPlayers: "..gameInfo.maxPlayers)
print("  screenshotCount: "..gameInfo.screenshotCount)
print("  hasWorldCapture: "..tostring(gameInfo.hasWorldCapture))
print("  isQueueEnabled: "..tostring(gameInfo.isQueueEnabled))
print("  description: "..gameInfo.description)

local tags = "["..
    CoreString.Join(", ", table.unpack(gameInfo:GetTags()))
.."]"

print("  tags: "..tags)
World Capture
World Capture allows creators to take an image from the camera's current position of a game to allow Portals to show a glimpse into the world from other projects. This World Capture creates a cube map that can be populated by anyone one creating a portal to the game, including when the game shows up in any of the queues in Core World.
Hint
Making sure all your games have cubemaps can set them apart in Core World and in any hub that uses Portals.
Use World Capture to Make a Game Cubemap
- Position your Editor camera to show your game the way you would want it to appear through a portal.
- In the upper right corner of the Core Editor, press the button labeled World Capture.
Find Existing Cubemaps
Cubemaps that you take using World Capture will appear in your project's Screenshots folder, in a subfolder called Cubemaps.
- With the project open in the Core Editor, click File in the top menu bar and select Show Project in Explorer.
- In the File Explorer, click the Screenshots folder to open it.
- Click Cubemaps to see your Cubemap files.
Publish a Cubemap
To update the Cubemap for your project, the world must be captured and the game republished in the same session. Follow the instructions above to use World Capture, and then press Publish to see the Cubemap appear in portals.
Game Categories
Creators have access to the Core Game queues, like Featured, Active, and Trending. They can be accessed through scripts using the CorePlatform namespace, which returns a table of CoreGameCollectionEntry objects.
Learn More
Player TransferToGame | CorePlatform Namespace | CoreGameInfo | CoreGameCollectionEntry